


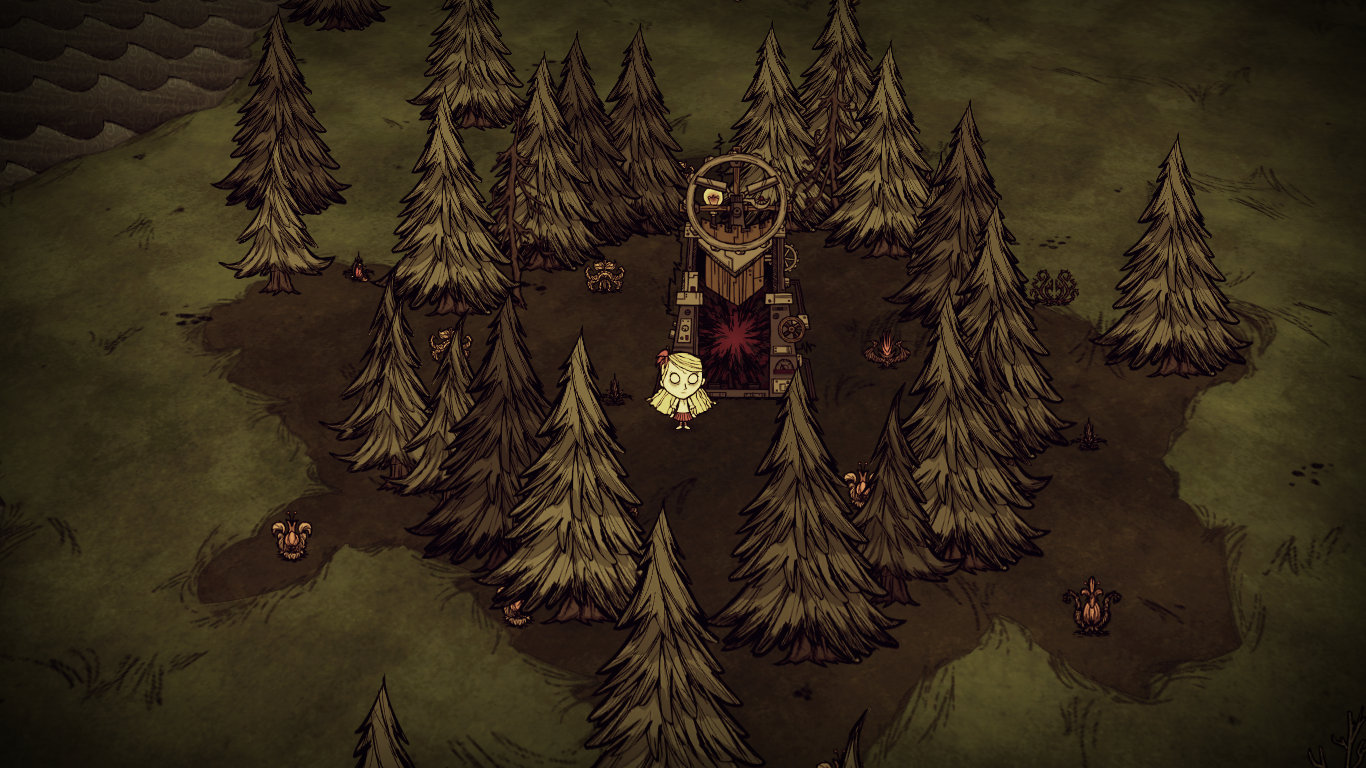
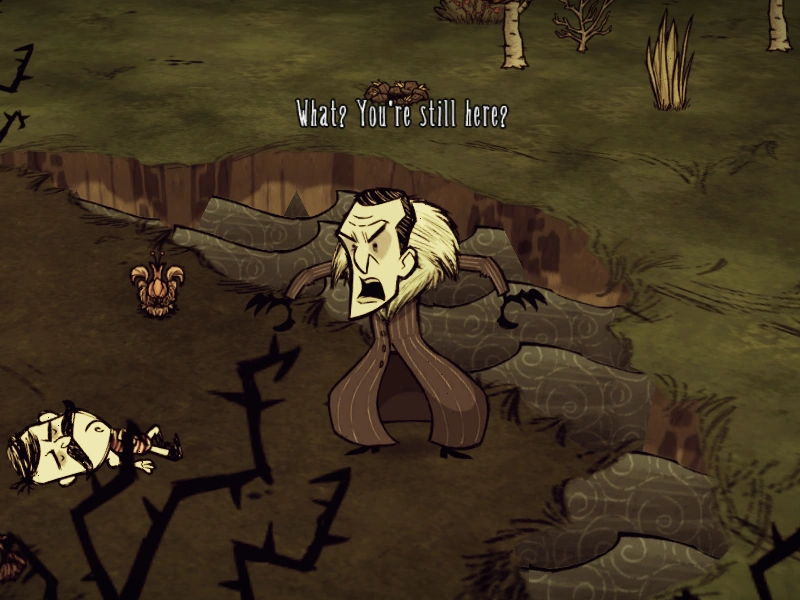
Screen view at the start of a chapter.

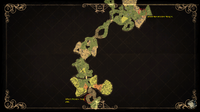
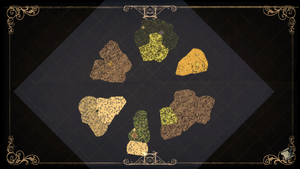
Picture of world 3 showing how far away certain parts can spawn from the Wooden Thing.
偵測到高等級的邪惡。」
– WX-78
冒險模式是饑荒的一個模式。在冒險模式中,玩家將進入一個與遊戲主宰者麥斯威爾的對抗戰役。世界將劃分為幾個章節,每一章節將有其各自的主題(將會藉由麥斯威爾介紹)。每章的主要的目標就是生存,拿到四個木製材料並組合起來,啟動它然後進入下一個章節。每個章節的目的是生存下去,收集收集木製傳送台的四個部分,組合它,並啟用它以前往下個章節。
進入下一個章節時可以選擇四個東西前往下一個章節(其他東西將會變成灰燼,威爾森的鬍子並不算物品,同樣的被WX-78 吃掉的齒輪也可以帶走。)任何章節的特定物品也會就此消滅,所以也不用特別蒐集物品。已經消耗材料製作但沒放置的建築等還是可以帶走,然後在新世界放置。
進入冒險模式
玩家將可以藉由沙盒模式中的麥斯威爾之門進入冒險模式。玩家可以帶走目前擁有的所有物品及製作樣板。如果玩家在冒險模式中死亡,便會在沙盒模式中重生並回到進入冒險模式之前的狀態。玩家還是可以馬上進去重新開始冒險模式。每次進去都會從第一章節開始,但是地圖會不一樣。
在每個關卡的開始,每次玩家加載冒險模式時,會顯示該關卡的標題和章節數量。冒險模式的長度是5個章節和一個結尾。大多數世界的外觀順序是隨機選擇的。然而,在第3,第4和第5世界,地圖將顯示一些指示目標在哪裡的路徑。一個世界只出現在一個冒險遊戲中,但是有比章節還更多的世界,這意味著一些世界可能不會出現。這5個關卡有72種可能的組合。
有關每章的更多提示,請參閱 Guides/Adventure Guide.(指南/冒險指南。)
Warning! The following text contains spoilers about the Adventure Mode worlds. It's always more fun to explore them yourself.
A Cold Reception
- 可能出現在第1 - 3章

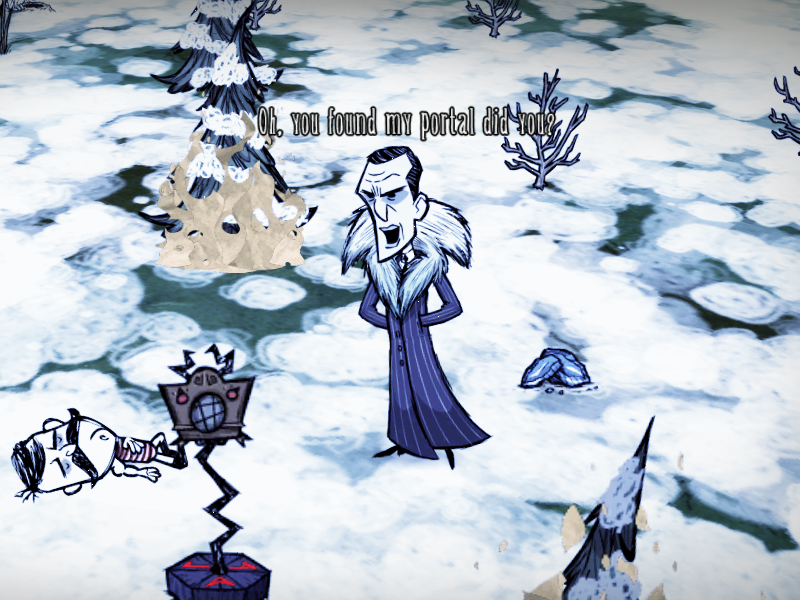
"Oh, You found my portal did you? You'd think you would have learned your lesson by now. Hmm. Let's try something a little more challenging, shall we?"
— Maxwell greeting the player
A Cold Reception跟沙盒世界很像,但它的季節變換非常快速。夏季的6個雨天緊接著就是冬季的3個下雪天,使探索更艱難。除此之外,白日在一天裡從不超過3格,冬季時又會更短。由於季節很短,幾個冬天不太可能看到鹿角怪。
A Cold Reception中至少有一項資源會是非常稀少的。有時關卡生成時樹枝會變得非常稀少,大部份會被荊棘叢所取代;其他狀況中,乾草資源可能很稀少也可能會很豐富,但全會是被摘過的狀態並需要施肥。這使想靠陷阱度過冬天變得困難。有時可能也不會有樹,只有沼澤遍地。你的食物來源是有限的;有幾個莓果(如果有的話)和胡蘿蔔可以是罕見的。更甚者,當對苺果或其他植物施肥時,它非常有可能(因為幾乎不停的雨)不幸地遭遇雷擊,所以避雷針是相當重要的。
總而言之,這一關可能跟生存模式很像,但玩家所有資源的取得壓力更大。至少有一個thing所在的島嶼,與之相連的橋會有豬人守衛崗哨而更加難以通過。但這也代表玩家能在島上找到豬王。持續的雨天意味著玩家可能得先面對大量的蛙雨,不過玩家可以利用牠們所帶來的益處,關卡中牠們能提供充足的食物來源。
提示:
- 如果這是你的第一個關卡,必須先盡可能的解鎖發明,因為它們在整個冒險模式中都不會重置。
- 當有其他青蛙在附近時千萬不要攻擊青蛙,牠們會全部追過來攻擊你。 嘗試風箏青蛙,直到他們放棄追逐你。
- 或者,你可以捕食青蛙,牠們能變成穩定的食物來源。只用陷阱抓住並且不攻擊青蛙的話,其他範圍內的青蛙不會對你產生仇恨。
- 如果這不是你的第一個關卡,請在之前的關卡先解鎖農田,連綿的雨會使作物非常快速的生長。
- 睡袋跟帳蓬在這個模式裡不管是度過夜晚或補充理智都非常有用。但回復理智是以犧牲飽食度為代價,缺乏食物的情況下非常不推薦。
- 在這一關能找到的食物來源:多個兔子洞;高腳鳥、青蛙跟野牛。高腳鳥通常會跟青蛙打起來,如果其中一隻沒有被青蛙殺死的話可以放牠風箏並殺掉牠。這是個得到肉、高腳鳥蛋跟青蛙腳的好方式。殺掉牠們會增加淘氣值,記得要小心坎普斯!
- 有幾個被蜘蛛巢擋住的地方。建立6個或更多的陷阱和引誘一波又一波的蜘蛛是一種很好清理他們的方法,另一種方法是嘗試焚燒蜘蛛巢,但是只有當蜘蛛巢在森林時才推薦,在那裡您首先點燃一棵樹。你也可以跑進來,盡可能地將榛果種植在盡可能靠近蜘蛛巢的地方,然後在它生長後點火並返回。如果您剛剛開始,您所在的地區沒有資源可以建造陷阱,您可以嘗試通過蜘蛛巢,以生命和理智為代價。
- 接下來的關卡很有可能會遇到 Archipelago, The Game is Afoot, or King of Winter, 不管哪個都是永凍。請準備兔子耳罩(最差),雪帽(普通)或牛帽(推薦),對通過之後關卡的幫助很大。
- 不管在白天或傍晚都要一直探索,只有在蒐集食物或最低限度的工具時能停下腳步。晚上在樹邊紮營火,這樣就能一直砍樹並烤胡蘿蔔吃。其他時候的夜晚就藉著火把繼續移動,靠著比較小的視野蒐集樹枝、乾草跟剃野牛的毛。如果這是你的第一個世界,並需要解鎖有用的科技;或者這是第四個世界,需要準備下個世界的物資時才有必要建立基地。
- 雨傘非常重要,因為理智在下不停的雨中會掉得非常快。
- 打雷的情況下WX-78就算拿著雨傘,理智也會有很大的麻煩。建議攜帶烤過的綠蘑菇或藍蘑菇,兩者能在黃昏及夜晚採集。
- 考慮收集花瓣並用它們來製作花冠。採摘花將恢復理智和花冠將有助於恢復由於雨和前幾天的睡眠導致的理智損失。如果你設法獲得一個科學儀器和六個蜘蛛絲,那麼你將能夠製作一個紳士高帽,這恢復了3.3理智/分鐘。雨水減少3.3理智/分,所以它使得0的理智損失。
- 一個快速簡單(也有風險)穿過被堵住的地區的辦法。像在豬人守衛崗哨的情況下,可以在木牆旁放置一個乾草或一個樹枝並用火把點燃它。
- 夏季中頻繁的降雨,需要使用更多的燃料來維持火焰。如果因為閃電而引發森林大火的話,可以堆疊40個的木炭能提供良好的供應。
- 找尋Things時,如果在一個類似島狀的地區,帶著占卜棒走在地區邊緣更可能容易的捕捉訊號,這樣就不需要探索大部份的地區。不過這方法在島範圍太大的時候不推薦。
Kink of winter_冬季之王
- May appear on chapters 1 - 4
"Well, would you look at that, you survived. One down, four to go!"
— Maxwell greeting the player
Players are spawned in a Grasslands Biome. Maxwell informs that endless winter has already begun, burning trees are around players to prevent from freezing while players hearing Maxwell's dialogue. Players can look forward to 1.5–3 minutes of daytime while juggling the ever-present effects of freezing, starvation, and insanity in this harsh climate. On the other hand, nights do not last long in this world. It also introduces Hound Mounds, identified by animal Bones on the ground. These are usually on a small area or island of their own, guarding a location on the map forcing players to go through if players want to get all the pieces. Deerclops seems to spawn on day 7 to 9. If players ignore him and leave him somewhere, it will prevent him from respawning somewhere closer. However, his eye can help players gain Hunger and Health back while also reducing your sanity if you need to go through some Obelisks. This may not be worth the risk in the earlier days, unless you have brought a durable Log Suit and Football Helmet combination to shield from damage.
The journey will be blocked by a group of Boulders or Obelisks. For the latter, players may need to have a certain level of sanity (either low or high level) in order to pass through the Bridges.
The world is permanently set to winter. The aim is to survive the cold without any preparation time. Do not try to stay here for long; find a place on the first 2 to 3 days to collect as many items as possible and get some food but then just go exploring as quick as you can to find the rest of the pieces.

This is one of the more difficult levels to start in because players initially have no way of keeping warm except for the Heat Stone, which isn't very effective. It is not a bad idea to stay here a little bit longer to prepare for the levels ahead. Getting the Tam o' Shanter is very helpful to raise your sanity back up when players have to go insane to get through the Obelisks.
Near the start location will be a dead adventurer with a backpack containing a schematic for one random invention, a Heat Stone, some Logs, Cut Grass, Twigs and a Torch. Sometimes the backpack may also contain a Red Gem and several Nightmare Fuels. Also, lying nearby is a schematic for Rabbit Earmuffs, a Divining Rod, Logs and an Axe.
General Tips:
This is a very difficult level and it might take you more than 3 tries to pass this. It depends on the number of obelisks crossing you will get in the level, also the type and amount of natural resources available (e.g. Rabbits may not be present at all, or limited grass in a sector).
- Because Obelisks will block your passage, it's important to know how to pass through them. There are 2 types of Obelisks. One requires you to have high Sanity, another requires you to have low Sanity. You will need 15% maximum sanity (30 for most characters) or lower to pass through the low one.
- Reduce Sanity by collecting (-5), eating (-5) or standing nearby (-25/min) Evil Flowers/Dark Petals, eating Raw Meat (-10), eating Cooked Monster Meat (-10), digging up graves (-10), eating raw Green Cap (-50), and more. Refer to Sanity list.
- Restore Sanity by picking up Flowers (+5), and eating Cooked Green Cap (+15) at the price of -1 Health. If you have enough Monster Meats/Meats, befriending a Pig will help increase sanity (+25/min).
- Accumulation of Green Mushrooms is highly suggested before crossing a low sanity Obelisks so that you can cook to quickly restore sanity.
- Timing is important when moving between 'sectors' that are split off by low level sanity Obelisks. Make sure you gather enough resources in case the new sector is lacking a particular resource (e.g. Boulders) and if you are unable to return to the previous location; as being insane can make it more difficuit with Crawling Horror threats.
- If you happen to start in or find a 'rich' resource area, you might want to consider staying in the area for a while to gather all its resources before moving to the next sector. Don't rush!
- It is best to stand near a fire source until the Heat Stone is charged to max. When it is charged to max, it will turn orange in color. This will give you more time to explore before building a fire.
- If you have problems finding Boulders, remember that those can be found in small numbers in the Forests. Also, Gold Nuggets can be scattered around Graveyards or near big amounts of Spider Dens.
- If you reach a choke point with Hound Mounds scattered around, two of the ways to get through them is by using a Beefalo Horn to lure beefalos and distract the hounds while you destroy the mounds or flat out running, avoiding the hound's attacks until you reach a place where the hounds stop following you (it is useful to wear a feather hat, as this will attract birds which will take the hounds interest for a short time).
- Hounds from Hound Mounds, Tallbirds, and even Deerclops can also be taken out with use of Tooth Traps and the kiting method.
- Obtaining the Tam o' Shanter can be tricky due to the long range of MacTusk's darts and the fast speed of his hounds. The best approach to the group is to lure the hounds away and deal with them separately from MacTusk and his son, analyze if any healing is necessary, then going back to fight MacTusk. You may need to try several times, as the hat has merely a 25% drop rate. It is the best hat in the game to wear for regaining sanity and also helps with warmth, making it a worthy endeavour.
Food/Resource Tips:
- Berry Bushes, Grass and other renewable resources no longer respawn. Plan accordingly when you use up an area's resources!
- If Grass is scarce, try to pick up as many as you can and use sparingly. Since the level has only winter, Logs and Grass are needed all the time to make Campfires. An alternative way to quickly get warm is to use a Torch to burn stray trees (so it won't spread) and Manure (if available). Manure can be collected and used to fuel camp fires. A great approach, if rocks are in good supply, is to build Fire Pits. These require no grass to build and are permanent.
- If there are Rabbits try to catch them with a Trap. Use Carrots to bait, or (preferred) 'guide' it towards the trap by placing it near the rabbit's home entrance so that it runs into the trap. 2 Rabbits and 1 twig are needed for Rabbit Earmuffs.
- If there are no Rabbits on the map, hunting for Koalefants will provide 8 Meat which is more cost effective than hunting for Beefalos. However, Koalefants are also time consuming to locate and they hit a bit harder than Beefalos. It is advisable to have Armor and a Ranged Weapon when hunting.
- Try to make a Crock Pot as soon as possible as it is more effective to fullfil your hunger and sanity.
- Remember to collect Monster Meat since it can be used to make Pigs follow you. They can be a great help fighting against MacTusks and other aggressive animals. Beware, feeding them 4 Monster Meats in total turns them into Werepigs. It is also helpful to use Monster Meat in Crock Pot recipes.
The Game is Afoot
- May appear on chapters 1 - 4
"What? You're still here? Impressive, but you should probably stop while you're ahead."
— Maxwell greeting the player
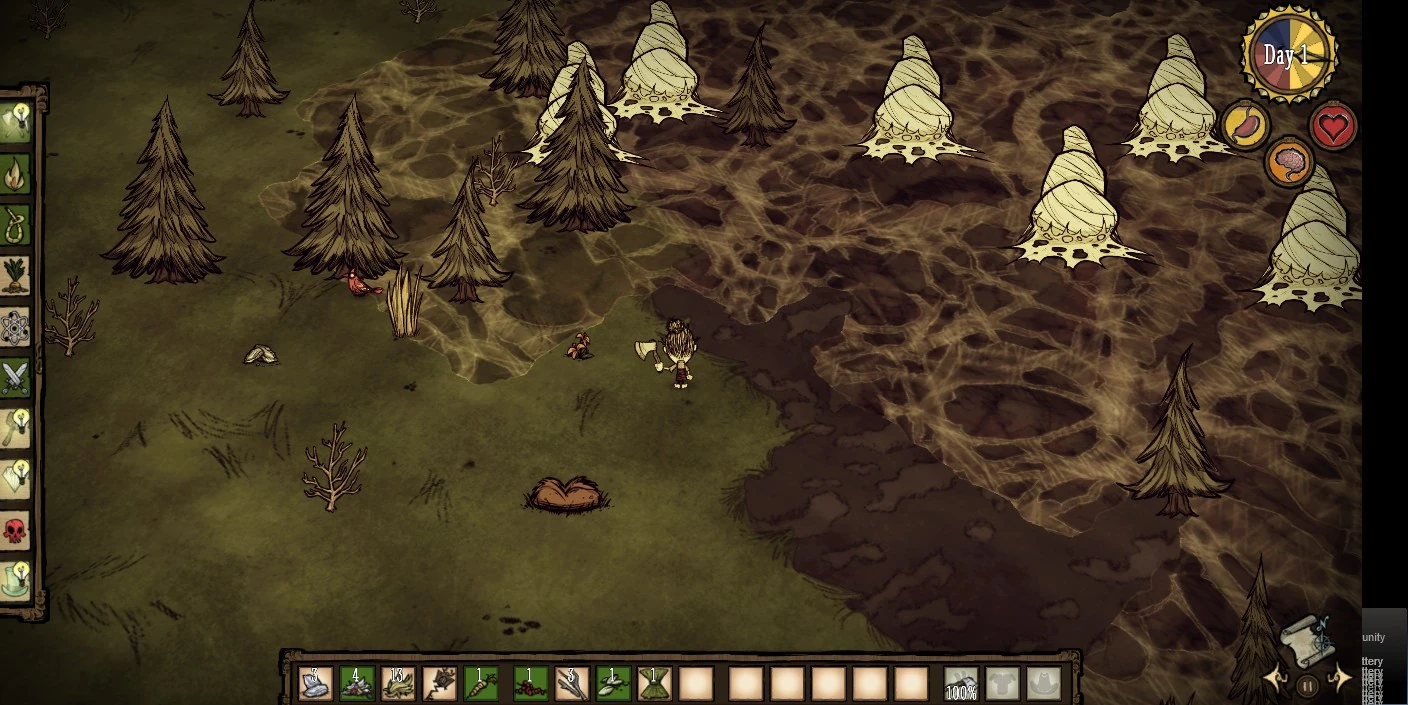
Players are spawned on the ground of a Marsh surrounded by normal Grassland. The player will spawn near a chest usually containing 7 Logs, a Winter Hat and 3 Flint. On a rare occasion the chest may contain 10 Rot and 4 random Blueprints. Sometimes the Chest is spawned near a Campfire and can be ignited immediately, costing the player the items inside. Seasonal cycles are not present in this world. The world begins in winter, and will turn to endless summer (Spring in Reign of Giants) after 10 days. Periodic Hound Attacks begin in this world.
The world features a resource-rich central island surrounded by dangerous lands containing the Teleportato Things. There is the possibility of an island being completely cut off from the rest of the world, requiring players to find a Wormhole to get to it. The central island will always have Grassland, Forest, and Savanna, but no other biomes except the tiny marsh at the spawning point. Outlying areas may have any biome.
Tips:
Players will see various mobs and mob housing occupying the bridges connecting the central landmass to the outlying areas and sometimes on bridges chaining together two outlying areas. It is also possible for a bridge to exist entirely within the central landmass connecting already contiguous land; in this case it can simply be avoided.
Players are advised to move quickly and be well equipped when crossing these blockades.
As Spiders will be present in the central area, it is possible to stock up on Healing Salves before venturing out.
A Grass Suit or Log Suit will provide protection without the reduced movement of a Marble Suit which can be deadly when running a blockade. It will also be possible to craft a Football Helmet from Pigs (the Crank Thing will always spawn one and there will usually be a pig village in an outlying area) or from Pig Heads near Touch Stones or Merm Houses.
Blockades on the bridges and the ways to deal with them:
- Keep in mind that not everything needs to be killed if it can be avoided by the player.
- Tier 3 Spider Dens - The Sticky Webbing around the dens will usually completely cover the ground, making it impossible to cross without provoking the spiders. The player can usually run past the Spider Dens anyway, at cost of Health as spiders attack. Equipping a Spiderhat and/or a Walking Cane can make this run safer. (For tips on clearing out the dens instead, see the Spider Den page.) If left alone, the tier 3 dens will spawn Spider Queens and consequently more dens, making the crossing more dangerous as time progresses.
- Hound Mounds - Avoidance is key here; this blockade can be run through because generally Hounds are not fast enough to catch a player who keeps moving. This is safer during Day when hounds are usually not roaming away from their mounds.
- Tallbird Nests - This blockade can be run through during Dusk or Night because during this time the Tallbirds sleep. This blockade will also have Boulders, including gold vein boulders, make it a valuable source of food and resources.
- Killer Bee Hives - A run through this blockade will almost always cost the player Health as not all attacks can be avoided. A player cornered by multiple Killer Bee swarms can easily be stun-locked and severely injured or killed; some cautious feints to avoid dead ends are advised. In addition to other armor, a Beekeeper Hat will reduce 80% of incoming damage from bees, useful either for running or for clearing the blockade. (For tips on clearing out some or all of the hives, see the Beehive page.)
- Clockwork Monsters - A run through this blockade will almost always cost the player Health as Clockwork Bishop attacks are difficult to avoid. It is possible to clear this blockade with mob-on-mob violence: use a Beefalo Horn or a Spiderhat to lead a mob into the blockade or position the Clockwork Rook to charge into the other clockwork monsters.
- Swamp Spiral - This spiral bridge is heavily infested with Tentacles leaving no safe place to stand. However, the tentacles do not anticipate the player's movements so it is possible to simply run around the spiral faster than the tentacles react, taking no damage except to Sanity. Stopping or reversing direction on the bridge is not advised, so watch for dead ends at the edges of the spiral.
")
")
")
")
")
")
Archipelago
- May appear on chapters 1 - 4

The map for an archipelago level

Wickerbottom in Archipelago, by some tier 3 Spider Dens and a Worm Hole.
— Maxwell greeting the player
Players are spawned on one of six islands. The only way to get to other islands are by Worm Holes.There is one Thing on each island; except on the island you begin. One island may contain one or more worm holes that split off to mulitple islands. It is likely you may need to return to the previous island(s) after collecting one piece of the Thing in order to set up the Teleportato at the Wooden Thing.
The season begins at the start of spring and will gradually change over time similar to sandbox mode. Each island is dominated by mostly one or two biomes. The islands are placed in a circular shape, and while the shape is no indication of the order the wormholes will travel in, each island always has the same two biomes, each time you try Archipelago.
The starting island has a small square shaped biome full of Carrots, Grass, Saplings, and Berry Bushes, and the rest of the island is dominated by a massive Swamp filled with Spider Dens, Tentacles, and Merms.
Tips:
- It is suggested that the first Forest biome you see you get enough Logs, Cut Grass, Twigs, and Flint to survive for a long while, because you won't be seeing some of the resources in the forest biome again.
- It is recommended that players establish a way to come back from or cope with insanity, since it is inevitable that you will be traveling via wormholes quite often.
- Usually, two of the six islands are Swamps. It can be very useful to stick around when Merms and Spiders fight Tentacles, as this gives you a free grinder. If the Tentacles die, you get a weapon. If the Merms die, you get Fish and Frog Legs which you can use to make Fish Sticks or Meatballs. If the Spiders die, you get free Silk and Spider Glands. Just be sure that nothing tries to kill you while picking up the loot.
- Spend the first day grabbing everything you can in the starting biome, especially food and flowers. Food is scarce on the other five islands, and there is a high insanity risk too.
- Each island may have a particular set of creatures according to the biomes.
- Starting and 2nd island: Swamp Biome has Merms, Spiders, Mosquitoes and Tentacles.
- 1 island: Grassland/Forest Biome has Killer Bee Hives, Bees, Spiders.
- 1 island: Rockyland Biome has Tallbirds.
- 1 island: Rockyland/Forest Biome has Spiders and Hound Mounds.
- 1 island: Savanna Biome has Beefalo, Spiders and usually the usual creatures near the Wooden Thing.
- When using the wormhole it is possible that you will travel into a middle of a field of Killer Bee Hives, Spiders, or aggressive creatures so be prepared to run to safety.
- You can destroy the hives/mounds with ranged weapons and fires, especially fire darts due to the abundance of trees (Charcoal) and Swamps (Reeds). (Not Advised as it is time and resource consuming; the objective is to locate the Things)
- If possible, bringing a Walking Cane from the previous level is helpful to kite aggressive creatures, pass through swamps with tentacles, and to locate the Things.
- If this is your fourth level, be prepared for the final stage; Darkness as it is quite difficult.
Two Worlds
- May appear on chapters 3 - 4

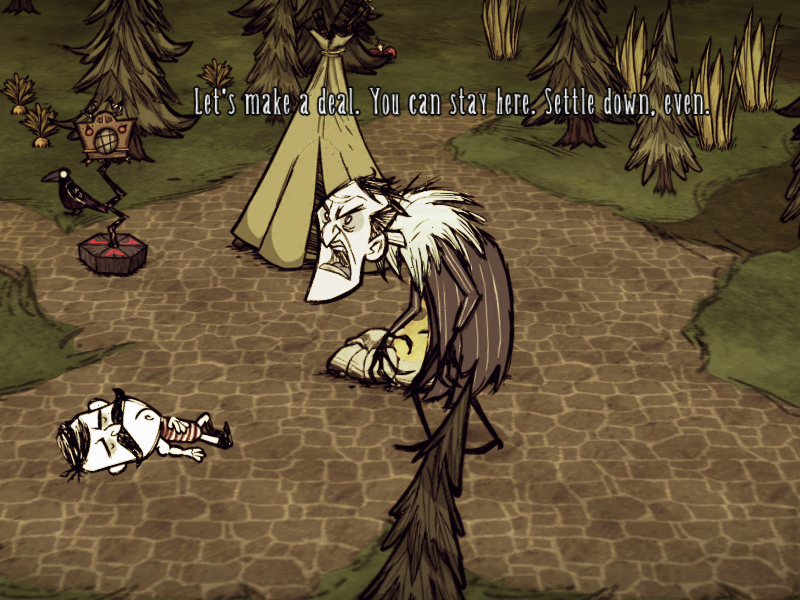
"Say. pal. Let's make a deal. You can stay here. Settle down, even. I'll give you food, gold, pigs, whatever you need. All I want in return is a truce."
— Maxwell greeting the player
The character awakens on ground made of Cobblestones surrounded by a Fire Pit, a Tent, Trees, Berry Bushes, and Carrots. Maxwell materializes to ask the player for a truce, provided you stay there. Seven out of eight minutes are daylight on the large mainland where you start. In addition, there are no Things on this land.
In order to locate the Things you must travel through Worm Holes that connects the mainland to the secondary land. There are two types of Worm Hole; One is the normal Wormhole you encounter in sandbox mode, and the other is Sick Worm Hole that can only be used for a one way trip.
When on the secondary island, certain parts of the biomes will cause the day/night cycle to turn from 7 out of 8 minutes day to a more normal cycle, about 3–4 minutes daylight out of 8. (E.g. Walking/traveling through worm hole from a grassland to a swamp biome will cause the time shift). Take care of the time when travelling between biomes as the time change may make it dark faster than you expect.
Tips:
- The mainland should have plenty of food and since daylight is much longer, respawn rates from berry bushes and other plants are faster.
- The secondary island has a range of aggressive creatures. Take caution.
- If this world appeared on chapter 3, it is recommended that you bring winter gear with you to the next world, as it is possible for 'The Game is Afoot' or 'King of Winter' to appear in chapter 4 if they haven't appeared before.
- If this world appeared on chapter 4, it is recommended that you bring a stack of fireflies (for a Miner Hat) and a lot of food (Jerky or Honey because of long-term storage), as the next world will be in permanent night and scarce on food. Use this chapter as a chance to prepare for the challenging level 'Darkness'.
Darkness
- Always appears on chapter 5

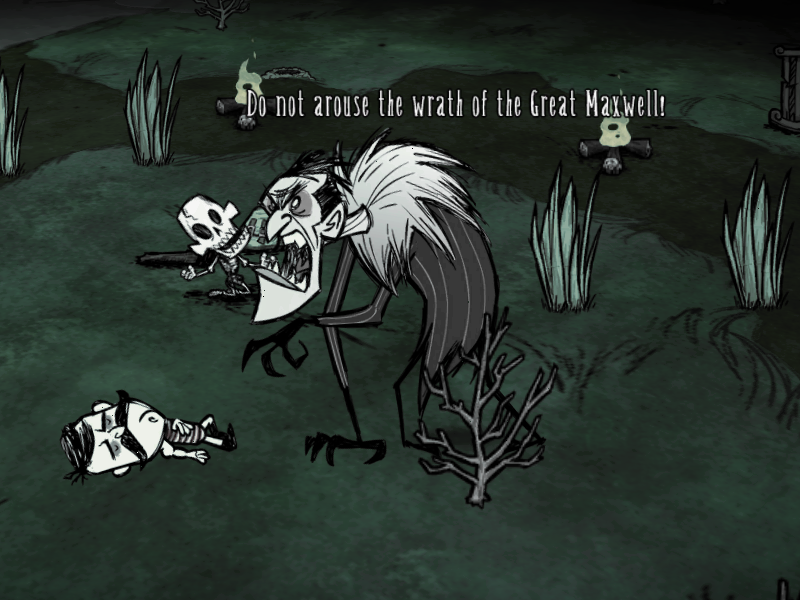
"You insolent, pitiful, insignificant ant! Do not arouse the wrath of the great Maxwell! You will regret coming any further..."
— Maxwell greeting the player
Chapter 5 has several modifiers making it the end of the journey for all but the most well-prepared players. The player spawns with a bunch of Campfires and Fire Pits surrounding you and there will be a backpack nearby which has schematics for the Miner Hat, a healthy stack of grass, a stack of logs, two random items, and an extra random blueprint .The level's Day-night cycle has only permanent night, thus players have to survive and find the Things in complete darkness. Since there is no day light, most creatures are asleep, crops won't grow and other plants may take longer to replenish themselves, and most importantly, your sanity continuously declines over time. To make things worse, due to chronic low sanity, building life-saving camp fires will often attract Night Hands that will attempt to put out the light (note: they also decrease sanity when you are near them).
There are almost no food resources for you to collect and your only source of natural light is Maxwell's Lights scattered around the map. Now, those might sound like a lot but they're really not going to help you much if you didn't come prepared yourself. The map is a linear progression where each Biomes are connected by a bridge (slightly similar to the ones in "King of Winter") that might be blocked by Boulders ; make sure you have a Pickaxe or gunpowder ready to blow through them. There is a chance that the bridge might be blocked by Obelisks. Each area has a Thing so make sure you find it before moving onto the next Biome.
There are Pigs sleeping on the map which you can kill for meat, however with their kiting A.I. they can be a bit tricky. There is a chance you will find Tallbirds in this map which are in your best interest to try and kill if you are comfortable dodging their attacks, especially if they have laid an egg. Koalefant is also quite worth it. There are Maxwell Lights positioned around the map that turn on when you get near them; use them as an opportunity to take out the Divining Rod to see if you're getting closer to the pieces. Cooking Mushrooms along the way can prevent you from becoming insane e.g. Cooked Blue or Green Caps that restores sanity. However, note the dual uses of Blue Mushroom which can be eaten raw to replenish hunger and health at the expense of sanity which can be a life saver in certain situations.
Tips:
- In order to build a Miner Hat it is HIGHLY recommended that you unlocked the Bug Net from the previous level so you can catch Fireflies. This will save grass and twigs from making torches. Bringing a stack of gold from the previous level is helpful. The greater light radius provided by the Miner Hat can be critical to survival when traveling through Tooth Trap fields and Hound Mound areas.
- Only build camp fires to cook your food, but you must hurry as Night Hands would put it out. It is not advised to stop them, as they will continuously attack the fire (due to permanent darkness) and also decreases your sanity(just put on the Miner's Hat and walk towards them constantly until they vanish).
- You may need to build a Log Suit while traveling through the Swamp Biomes as the darkness makes it difficult to navigate and avoid tentacles. This means sacrificing your backpack.
- If you haven't found any of these food sources and you're getting desperate for food, you're going to have to resort to Spiders. Cooked Monster Meat can be a life saver at the expense of sanity.
- Suggested items to bring over from previous level:
- A stack of gold to facilitate making the Miner's Hats.
- A Walking Cane to kite and travel faster.
- A stack of Jerky or other long-lasting food supply that also restores health or sanity.
- Spider Silk for catching Fireflies with Bug Nets and Top Hats or a Tam o' Shanter (highly recommended) to use when standing near stationary light sources; or pre-captured stack of Fireflies for Miner Hats, or something else of your choosing.
Epilogue: Checkmate
- Appears after all the other chapters.
"Well, this is it. You found me. Now, what are you going to do?"
— Maxwell meeting the player
This is the last level and the player has reached Maxwell's Island – a small labyrinth leading to Maxwell's hall.
Epilogue is a dark and dead wasteland, with a hallway in the center leading to the Nightmare Throne. The hallway branches of into small areas containing resources. The first area contains 4 chests full with supplies, in the second area there is some grass and berry bushes (most are barren), the third area has 3 crafting stations used for prototyping, and the last area has 3 Crock Pots and some mixed food laying on the ground next to them. There is permanent night and Maxwell's Lights are showing your way. No matter what level your sanity may be, eyes can be seen in the darkness. Out in the wastelands is a fully assembled Teleportato that, when used teleports the player to the Nightmare Throne. Also, the map will always be covered by fog, even after you've explored an area, thus your map will be completely useless.
At the end of the road, players will reach Maxwell's Hall. A deformed Maxwell is sitting in a large chair with a phonograph nearby playing music (if you turn it off, Maxwell will thank you). When meeting Maxwell, he will start talking, telling the player that when he got here there was nothing but dust, and "them" and that he doesn't know what they want, that they are just watching. If the player attacks Maxwell, then the throne protects him (a lightning will strike you and no matter what weapon you are holding, it will vanish), and Maxwell tells the player that the throne will not allow it. He also tells you that he has been around here for a long time, and that the player can stay around and keep him company, or to put the key in the box.
Next to the throne is the Nightmare Lock where the Divining Rod can be placed. If the Divining Rod is put in the lock, the game will ask you if you want to take pity on Maxwell but also that his captors would not be happy about it. When Maxwell is freed from the throne, he gets up and instantly dies, then turns to dust and fades away. Your character is grabbed by Shadow Hands and is placed on the throne, effectively taking Maxwell's place and becoming the new pawn (and turning the phonograph on again, if the player had turned it off before). After that you will get the final speech from Klei, and then be brought back to your sandbox game...as Maxwell! Congratulations! You have beaten Adventure Mode!
Note: If you beat Adventure World as Maxwell, the person you completed the game with last will be sitting in the chair, still doing the terrified animation. Unlocking the lock will kill them, and put Maxwell back in the chair. You will wake up in your world as that person.
Note: There will still be periodic Hound Attacks in this level.
Easter egg: Far behind (in the left side) the Nightmare throne is a graveyard, with an Eyebone and a Miner Hat next to a skeleton. On the graves are the names of the developers of the game, one example being Kevin Forbes. Caution is advised if the graves are dug up, as ghosts have a 100% chance to spawn from them.
Easter egg: Randomly placed somewhere on the map, there is an island made of 2-3 tiles, on which there is a Teleportato as well as the 4 pieces. This island cannot be reached or "mapped" without the use of cheats, and when this Teleportato is used, it teleports you back to the nightmare throne and a second deformed Maxwell will spawn (not on the throne) and say "Don't you think I've tried that?" then disappear.
Easter egg: If you use the console to reveal the minimap fog, an island will be visible that is completely barren save for the underlaying grass turf. This island may be a sandbox, allowing the player to use the console to spawn or build anything they like without any of the normal world distractions like the day/night cycle, weather, mobs, etc.
Exiting Adventure Mode
If the player dies in Adventure Mode, they will wake up in Sandbox Mode in the same state as they left it.
If the player beats Adventure Mode, they will wake up in Sandbox Mode in the same state as they left it, with one exception: they will now be the character who was rescued from the Nightmare Throne. The player may continue their Sandbox survival with this new character or choose to open Maxwell's Door again and attempt to rescue their original character.
When returning to the Sandbox by death or victory, the player will have all of the items previously held in the Sandbox and know all of the recipes previously learned in the Sandbox by the character who entered Adventure Mode. The items in the player's Adventure Mode inventory are lost and the recipes learned during Adventure Mode are forgotten. The player can immediately enter Adventure Mode again if they wish.
Possible Levels Found In Adventure Mode | ||||||
|---|---|---|---|---|---|---|
| A Cold Reception | King of Winter | The Game Is Afoot | Archipelago | Two Worlds | Darkness | |
| Chapter 1 | yes | yes | yes | yes | no | no |
| Chapter 2 | yes | yes | yes | yes | no | no |
| Chapter 3 | yes | yes | yes | yes | yes | no |
| Chapter 4 | no | yes | yes | yes | yes | no |
| Chapter 5 | no | no | no | no | no | yes |
 漏洞
漏洞
- Chapters can sometimes be skipped by rapidly clicking the "Lets go" button. Additionally, chapters will sometimes load as the previous chapter's ending, allowing the player to reload the teleportato and go immediately to the chapter after that.
- In Chapter 5, "Darkness," at full moon if the game is saved and reloaded the full moon will be permanent. However, a full moon no longer provides illumination in this chapter.
- If the player beats Adventure Mode as Woodie and takes pity on Maxwell, the Nightmare Throne (and by extension, Woodie) will be facing away from the screen.
- Sometimes, in the "The Game is Afoot" or "Archipelago" level, there is no Metal Potato Thing.
| 遊戲機制 | |
| 活動 | 烹飪 • 合成 • 耕種 • 釣魚 • 睡眠 • 骑乘野牛 |
| 環境 | 日夜週期 • 月亮週期 • 夢魘循環 • 地震 • 閃電 • 雨天 |
| 季節 | 夏天 • 冬天 |
| 機制 | 鬍鬚 • 生態環境 • 角色 • 查理 • 控制 • 合成 • 死亡 • 耐久度 • 經驗 • 火 • 食物腐敗 • 寒冷 • 生命值 • 飢餓值 • 物品欄 • 光源 • 地圖 • 罪惡值 • 不可再生資源 • 理智值 • 存檔 • 建築 |
| 模式 | 冒險模式 • 沙盒模式 • 洞穴 • 遺跡 • 火山 • 多人版饑荒 • 自定義世界 |
| 其他 | 豬人村 • 道路(小徑)• 墓地 • 海洋 • 深淵 • 橋 • 佈景 • 零件 • 死亡紀錄 |