Tag: sourceedit |
m (Expanded - link FR) |
||
| (33 intermediate revisions by 18 users not shown) | |||
| Line 1: | Line 1: | ||
| − | [[File:Sandbox.png|thumb|Beginning a new game puts the player in Sandbox Mode]] |
||
| − | '''Sandbox Mode''' is the game mode in which players begin their world. Prior to starting a new game, the player has the option to customize their world and may set things such as the frequency of [[Hound]] attacks or the occurrence of seasons. When a new world is started, the player is set in a randomly-generated world and is told by [[Maxwell (NPC)|Maxwell]] to find some food before night comes. |
||
| + | [[File:Sandbox Mode.png|thumb|Beginning a new game puts the player in Survival Mode]] |
||
| − | In order to enter [[Adventure Mode]], the player must find [[Maxwell's Door]], which is located somewhere in the world, though usually quite far from where the player first spawned. |
||
| + | '''Survival Mode''' is the default game mode in ''Don't Starve''. Players enter Survival Mode when starting a new world. Each new world is randomly generated, and can optionally be [[World Customization|customized]] before the world is created, specifying various options like frequency of [[Hound]] attacks or the occurrence of [[Seasons]]. When the player enters the world, their character is greeted by [[Maxwell (NPC)|Maxwell]], telling them to find some food before night comes. |
||
| + | There is no preset goal in this mode, aside from survival. Players can choose to gather [[Things]] randomly placed around the world, and build the [[Teleportato|portal]] to another survival world, keeping their knowledge and items that they can carry on them, but sacrificing the existing world. In order to enter [[Adventure Mode]], the player must find [[Maxwell's Door]], which is located in a random location in each world, though usually quite far from where the player first spawned. |
||
| − | ==Sandbox (Custom)== |
||
| + | =={{Pic32|Blueprint}} Pictures == |
||
| − | There are a total of 47 customization options available when creating a new world. These customization options serve to allow the player to tweak a world to their liking. Note that setting many of the options that concern spawn rates to anything above the "default" value will cause those resources to spawn outside of their native biomes. Examples include [[Reeds]] and [[Beefalo]]. The options are shown below (in the order they appear in the World Settings screen): |
||
| + | <gallery> |
||
| − | |||
| + | Edit.jpg|Players can customize their worlds using this interface. |
||
| − | {| class="article-table" style="width: 650px; height: 200px; " border="1" cellpadding="1" cellspacing="1" |
||
| − | ! scope="col" style="text-align:center;" |Type |
||
| − | ! scope="col" style="text-align:center;" |Icon |
||
| − | ! scope="col" style="text-align:center;" |Content |
||
| − | |- |
||
| − | | style="text-align:center;" |'''World Size''' |
||
| − | | style="text-align:center;vertical-align:middle;" |[[File:WorldSize.png|center]] |
||
| − | | style="text-align:left;" | |
||
| − | Determines the size of the world. This does not appear to increase the number of biomes. It just makes the individual biomes larger.<br />Available options are ''default'', ''medium'', ''large'', and ''huge''. |
||
| − | |- |
||
| − | | style="text-align:center;" |'''Land Branching''' |
||
| − | | style="text-align:center;vertical-align:middle;" |[[File:LandBranch.png|center]] |
||
| − | | style="text-align:left;" |Determines the degree to which the land will branch off and be connected by bridging pieces.<br />Available options are ''least'', ''default'' and ''most.'' |
||
| − | |- |
||
| − | | style="text-align:center;" |'''Land Looping''' |
||
| − | | style="text-align:center;vertical-align:middle;" |[[File:LandLoop.png|center]] |
||
| − | | style="text-align:left;" |Determines the degree to which the [[Roads]] will tend to lead you in circles, in addition to determining the degree to which the land will curve. Available options are ''none'', ''default'' and ''always''. |
||
| − | |- |
||
| − | | style="text-align:center;" |'''[[Season|Length of Seasons]] ''' |
||
| − | | style="text-align:center;vertical-align:middle;" |[[File:Seasons.png|center]] |
||
| − | | style="text-align:left;" | |
||
| − | Determines the length of [[Summer]] and [[Winter]].<br />Available options are ''only Summer'', ''only Winter'', d''efault'', ''long Summer'', ''long Winter'', ''long both'' and ''short both''. |
||
| − | |- |
||
| − | | style="text-align:center;" |'''Starting Season''' |
||
| − | | style="text-align:center;vertical-align:middle;" |[[File:SeasonStart.png|center]] |
||
| − | | style="text-align:left;" |Determines the starting season.<br />Available options are [[Summer]] and [[Winter]]. In Don't Starve Reing of Giants (RoG) it is also possible to choose between [[Spring]] and [[Autumn]], in witch ''Spring'' is the most raining season that leads to ''Summer'', and ''Autumn'' is the season in witch big [[Birchnut Trees]] may spawn 2 [[Birchnut]] and leads to ''Winter''. |
||
| − | |- |
||
| − | | style="text-align:center;" |'''[[Day-Night Cycle|Length of Day]]''' |
||
| − | | style="text-align:center;vertical-align:middle;" |[[File:DayNightCycle.png|center]] |
||
| − | | style="text-align:left;" |Determines the length and/or presence/absence of [[Day]], [[Dusk]], and [[Night]]. Available options are ''only Day'', ''only Dusk'', ''only Night'', ''default'', ''long Day'', ''long Dusk'' and ''long Night''. |
||
| − | |- |
||
| − | | style="text-align:center;" |'''[[Rain|Weather]] ''' |
||
| − | | style="text-align:center;vertical-align:middle;" |[[File:Weather.png|center]] |
||
| − | | style="text-align:left;" |Determines the frequency of weather events.<br />Available options are ''none'', ''less'', ''default'', ''more ''and ''lots.'' |
||
| − | |- |
||
| − | | style="text-align:center;" |'''[[Lightning]]''' |
||
| − | | style="text-align:center;vertical-align:middle;" |[[File:Lightning.png|center]] |
||
| − | | style="text-align:left;" |Determines the frequency of lightning strikes.<br />Available options are ''none'', ''less'', ''default'', ''more'' and ''lots''. |
||
| − | |- |
||
| − | | style="text-align:center;" |'''[[Sinkhole]]s ''' |
||
| − | | style="text-align:center;vertical-align:middle;" |[[File:SinkholesIcon.png|center]] |
||
| − | | style="text-align:left;" |Determines whether Sinkholes are generated.<br />Available options are ''yes'' or ''no''. |
||
| − | |- |
||
| − | | style="text-align:center;" |'''[[Pig Head]]s ''' |
||
| − | | style="text-align:center;vertical-align:middle;" |[[File:PigHead.png|center]] |
||
| − | | style="text-align:left;" |Determines the amount of naturally spawning Touchstones.<br />Available options are ''none'', ''less'', ''default'', ''more'' and ''lots''. |
||
| − | |- |
||
| − | | style="text-align:center;" |'''[[Skeleton]]s ''' |
||
| − | | style="text-align:center;vertical-align:middle;" |[[File:Skeletons.png|center]] |
||
| − | | style="text-align:left;" |Determines the amount of naturally spawning Skeletons.<br />Available options are ''none'', ''less'', ''default'', ''more'' and ''lots''. |
||
| − | |- |
||
| − | | style="text-align:center;" |'''[[Flower]]s ''' |
||
| − | | style="text-align:center;vertical-align:middle;" |[[File:Flowers.png|center]] |
||
| − | | style="text-align:left;" |Determines the amount of naturally spawning Flowers.<br />Available options are ''none'', ''less'', ''default'', ''more'' and ''lots''. |
||
| − | |- |
||
| − | | style="text-align:center;" |'''[[Grass]]''' |
||
| − | | style="text-align:center;vertical-align:middle;" |[[File:Grass.png|center]] |
||
| − | | style="text-align:left;" |Determines the amount of naturally spawning Grass.<br />Available options are ''none'', ''less'', ''default'', ''more'' and ''lots''. |
||
| − | |- |
||
| − | | style="text-align:center;" |'''[[Saplings]]''' |
||
| − | | style="text-align:center;vertical-align:middle;" |[[File:SaplingIcon.png|center]] |
||
| − | | style="text-align:left;" |Determines the amount of naturally spawning Saplings.<br />Available options are ''none'', ''less'', ''default'', ''more'' and ''lots''. |
||
| − | |- |
||
| − | | style="text-align:center;" |'''[[Spiky Bush]]es ''' |
||
| − | | style="text-align:center;vertical-align:middle;" |[[File:SpikyBushes.png|center]] |
||
| − | | style="text-align:left;" |Determines the amount of naturally spawning Spiky Bushes.<br />Available options are ''none'', ''less'', ''default'', ''more'' and ''lots''. |
||
| − | |- |
||
| − | | style="text-align:center;" |'''[[Reeds]]''' |
||
| − | | style="text-align:center;vertical-align:middle;" |[[File:ReedsIcon.png|center]] |
||
| − | | style="text-align:left;" |Determines the amount of naturally spawning Reeds.<br />Available options are ''none'', ''less'', ''default'', ''more'' and ''lots''. |
||
| − | |- |
||
| − | | style="text-align:center;" |'''[[Trees]]''' |
||
| − | | style="text-align:center;vertical-align:middle;" |[[File:Tree.png|center]] |
||
| − | | style="text-align:left;" |Determines the amount of naturally spawning Trees.<br />Available options are ''none'', ''less'', ''default'', ''more'' and ''lots''. |
||
| − | |- |
||
| − | | style="text-align:center;" |'''[[Flint]] ''' |
||
| − | | style="text-align:center;vertical-align:middle;" |[[File:FlintIcon.png|center]] |
||
| − | | style="text-align:left;" |Determines the amount of naturally spawning Flint found on the ground. Available options are ''none'', ''less'', ''default'', ''more'' and ''lots''. |
||
| − | |- |
||
| − | | style="text-align:center;" |'''[[Rocks]]''' |
||
| − | | style="text-align:center;vertical-align:middle;" |[[File:RocksIcon.png|center]] |
||
| − | | style="text-align:left;" |Determines the amount of naturally spawning Rocks.<br />Available options are ''none'', ''less'', ''default'', ''more'' and ''lots''. |
||
| − | |- |
||
| − | | style="text-align:center;" |'''[[Boulder]]s ''' |
||
| − | | style="text-align:center;vertical-align:middle;" |[[File:Boulders.png|center]] |
||
| − | | style="text-align:left;" |Determines the amount of naturally spawning Boulders.<br />Available options are ''none'', ''less'', ''default'', ''more'' and ''lots''. |
||
| − | |- |
||
| − | | style="text-align:center;" |'''[[Berry Bushes]]''' |
||
| − | | style="text-align:center;vertical-align:middle;" |[[File:BerryBush.png|center]] |
||
| − | | style="text-align:left;" |Determines the amount of naturally spawning Berry Bushes.<br />Available options are ''none'', ''less'', ''default'', ''more'' and ''lots.'' |
||
| − | |- |
||
| − | | style="text-align:center;" |'''[[Carrots]]''' |
||
| − | | style="text-align:center;vertical-align:middle;" |[[File:CarrotIcon.png|center]] |
||
| − | | style="text-align:left;" |Determines the amount of naturally spawning Carrots.<br />Available options are ''none'', ''less'', ''default'', ''more'' and ''lots.'' |
||
| − | |- |
||
| − | | style="text-align:center;" |'''[[Mushroom]]s ''' |
||
| − | | style="text-align:center;vertical-align:middle;" |[[File:MushroomsIcon.png|center]] |
||
| − | | style="text-align:left;" |Determines the amount of naturally spawning Mushrooms.<br />Available options are ''none'', ''less'', ''default'', ''more'' and ''lots''. |
||
| − | |- |
||
| − | | style="text-align:center;" |'''[[Mandrake]]s''' |
||
| − | | style="text-align:center;vertical-align:middle;" |[[File:MandrakeIcon.png|center]] |
||
| − | | style="text-align:left;" |Determines the amount of naturally spawning Mandrakes.<br />Available options are ''none'', ''less'', ''default'', ''more'' and ''lots''. |
||
| − | |- |
||
| − | | style="text-align:center;" |'''[[Rabbits]]''' |
||
| − | | style="text-align:center;vertical-align:middle;" |[[File:RabbitIcon.png|center]] |
||
| − | | style="text-align:left;" |Determines the amount of natuarlly spawning [[Rabbit Hole]]s.<br />Available options are ''none'', ''less'', ''default'', ''more'' and ''lots''. |
||
| − | |- |
||
| − | | style="text-align:center;" |'''[[Butterfly|Butterflies]] ''' |
||
| − | | style="text-align:center;vertical-align:middle;" |[[File:Butterflies.png|center]] |
||
| − | | style="text-align:left;" |Determines the population of Butterflies that naturally spawn from Flowers. Available options are ''none'', ''less'', ''default'', ''more'' and ''lots''. |
||
| − | |- |
||
| − | | style="text-align:center;" |'''[[Birds]] ''' |
||
| − | | style="text-align:center;vertical-align:middle;" |[[File:Birds.png|center]] |
||
| − | | style="text-align:left;" |Determines the population of Birds that naturally spawn and the frequency with which they appear on screen. Available options are ''none'', ''less'', ''default'', ''more'' and ''lots''. |
||
| − | |- |
||
| − | | style="text-align:center;" |'''[[Gobbler]]s ''' |
||
| − | | style="text-align:center;vertical-align:middle;" |[[File:GobblerIcon.png|center]] |
||
| − | | style="text-align:left;" |Determines the frequency of spawning Gobblers.<br />Available options are ''none'', ''less'', ''default'', ''more'' and ''lots''. |
||
| − | |- |
||
| − | | style="text-align:center;" |'''[[Pigs]]''' |
||
| − | | style="text-align:center;vertical-align:middle;" |[[File:PigIcon.png|center]] |
||
| − | | style="text-align:left;" |Determines the population of [[Pig House]]s.<br />Available options are ''none'', ''less'', ''default'', ''more'' and ''lots''. |
||
| − | |- |
||
| − | | style="text-align:center;" |'''[[Beefalo]]''' |
||
| − | | style="text-align:center;vertical-align:middle;" |[[File:BeefaloIcon.png|center]] |
||
| − | | style="text-align:left;" |Determines the population of Beefalo.<br />Available options are ''none'', ''less'', ''default'', ''more'' and ''lots''. |
||
| − | |- |
||
| − | | style="text-align:center;" |'''Beefalo in Heat''' |
||
| − | | style="text-align:center;vertical-align:middle;" |[[File:BeefaloHeat.png|center]] |
||
| − | | style="text-align:left;" |Determines the frequency at which Beefalo will go into heat.<br />Available options are ''none'', ''less'', ''default'', ''more'' and ''lots''. |
||
| − | |- |
||
| − | | style="text-align:center;" |'''[[Suspicious Dirt Pile]]''' |
||
| − | | style="text-align:center;vertical-align:middle;" |[[File:KoalefantTracks.png|center]] |
||
| − | | style="text-align:left;" |Determines the amount of naturally spawning Animal Tracks.<br />Available options are ''none'', ''less'', ''default'', ''more'' and ''lots''. |
||
| − | |- |
||
| − | | style="text-align:center;" |'''[[Pengull]]s ''' |
||
| − | | style="text-align:center;vertical-align:middle;" |[[File:Pengulls.png|center]] |
||
| − | | style="text-align:left;" |Determines the population of Pengulls that naturally spawn.<br />Available options are ''none'', ''less'', ''default'', ''more'' and ''lots''. |
||
| − | |- |
||
| − | | style="text-align:center;" |'''[[Pond]]s ''' |
||
| − | | style="text-align:center;vertical-align:middle;" |[[File:PondIcon.png|center]] |
||
| − | | style="text-align:left;" |Determines the amount of naturally spawning [[Pond]]s.<br />Available options are ''none'', ''less'', ''default'', ''more'' and ''lots''. |
||
| − | |- |
||
| − | | style="text-align:center;" |'''[[Beehive]]s ''' |
||
| − | | style="text-align:center;vertical-align:middle;" |[[File:BeehiveIcon.png|center]] |
||
| − | | style="text-align:left;" |Determines the amount of naturally spawning [[Beehive]]s.<br />Available options are ''none'', ''less'', ''default'', ''more'' and ''lots''. |
||
| − | |- |
||
| − | | style="text-align:center;" |'''[[Killer Bee Hive|Killer Beehives]] ''' |
||
| − | | style="text-align:center;vertical-align:middle;" |[[File:KillerBeehives.png|center]] |
||
| − | | style="text-align:left;" |Determines the amount of naturally spawning Killer Beehives.<br />Available options are ''none'', ''less'', ''default'', ''more'' and ''lots''. |
||
| − | |- |
||
| − | | style="text-align:center;" |'''[[Tallbirds]]''' |
||
| − | | style="text-align:center;vertical-align:middle;" |[[File:TallbirdIcon.png|center]] |
||
| − | | style="text-align:left;" |Determines the population of [[Tallbird Nest]]s.<br />Available options are ''none'', ''less'', ''default'', ''more'' and ''lots''. |
||
| − | |- |
||
| − | | style="text-align:center;" |'''[[Spider]]s ''' |
||
| − | | style="text-align:center;vertical-align:middle;" |[[File:Spiders.png|center]] |
||
| − | | style="text-align:left;" |Determines the number of naturally spawning Spider Dens and free roaming Spiders.<br />Available options are ''none'', ''less'', ''default'', ''more'' and ''lots''. |
||
| − | |- |
||
| − | | style="text-align:center;" |'''[[Hounds]]''' |
||
| − | | style="text-align:center;vertical-align:middle;" |[[File:HoundIcon.png|center]] |
||
| − | | style="text-align:left;" |Determines the frequency of Hound attacks.<br />Available options are ''none'', ''less'', ''default'', ''more'' and ''lots''. |
||
| − | |- |
||
| − | | style="text-align:center;" |'''[[Merm]]s ''' |
||
| − | | style="text-align:center;vertical-align:middle;" |[[File:Merms.png|center]] |
||
| − | | style="text-align:left;" |Determines the number of naturally spawning Rundown Houses and Merms. Available options are ''none'', ''less'', ''default'', ''more'' and ''lots''. |
||
| − | |- |
||
| − | | style="text-align:center;" |'''[[Tentacles]]''' |
||
| − | | style="text-align:center;vertical-align:middle;" |[[File:TentacleIcon.png|center]] |
||
| − | | style="text-align:left;" |Determines the amount of naturally spawning Tentacles.<br />Available options are ''none'', ''less'', ''default'', ''more'' and ''lots''. |
||
| − | |- |
||
| − | | style="text-align:center;" |'''[[Clockwork Monsters|Clockwork Mobs]] ''' |
||
| − | | style="text-align:center;vertical-align:middle;" |[[File:ClockworkMobs.png|center]] |
||
| − | | style="text-align:left;" |Determines the number of naturally spawning Clockwork Mobs. Available options are ''none, less, default, more ''and ''lots''. |
||
| − | |- |
||
| − | | style="text-align:center;" |'''[[Lureplant|Lure Plants/ Meatbulbs]] ''' |
||
| − | | style="text-align:center;vertical-align:middle;" |[[File:LurePlants.png|center]] |
||
| − | | style="text-align:left;" |Determines the number and frequency of naturally spawning Lureplants. Available options are ''none'', ''less'', ''default'', ''more'' and ''lots''. |
||
| − | |- |
||
| − | | style="text-align:center;" |'''[[MacTusk]]s ''' |
||
| − | | style="text-align:center;vertical-align:middle;" |[[File:MacTusks.png|center]] |
||
| − | | style="text-align:left;" |Determines the number of naturally spawning Walrus Camps.<br />Available options are ''none'', ''less'', ''default'', ''more'' and ''lots''. |
||
| − | |- |
||
| − | | style="text-align:center;" |'''[[Treeguard]]s''' |
||
| − | | style="text-align:center;vertical-align:middle;" |[[File:TreeguardIcon.png|center]] |
||
| − | | style="text-align:left;" |Determines the spawn rate of Treeguards.<br />Available options are ''none'', ''less'', ''default'', ''more'' and ''lots''. |
||
| − | |- |
||
| − | | style="text-align:center;" |'''[[Krampus]]''' |
||
| − | | style="text-align:center;vertical-align:middle;" |[[File:KrampusIcon.png|center]] |
||
| − | | style="text-align:left;" |Determines the spawn rate of Krampus.<br />Available options are ''none'', ''less'', ''default'', ''more'' and ''lots''. |
||
| − | |- |
||
| − | | style="text-align:center;" |'''[[Deerclops]]''' |
||
| − | | style="text-align:center;vertical-align:middle;" |[[File:DeerclopsIcon.png|center]] |
||
| − | | style="text-align:left;" |Determines the spawn rate of Deerclops.<br />Available options are ''none'', ''less'', ''default'', ''more'' and ''lots''. |
||
| − | |} |
||
| − | |||
| − | Additional information concerning specific consequences of the customization options: |
||
| − | * A long season lasts ~'''50''' days. |
||
| − | * A short season lasts ~'''10''' days. |
||
| − | * A long day is '''14 daylight hours, 1 dusk hour and 1 night hour''' of the clock. |
||
| − | * A long dusk is '''7 daylight hours, 6 dusk hours and 3 night hours '''of the clock. |
||
| − | * A long night is '''5 daylight hours, 2 dusk hours and 9 night hours''' of the clock. |
||
| − | * Resources, animals, and foods set to ''lots'' will '''spawn in every biome''', with the exception of plants in [[Rockyland]]. |
||
| − | * Rain set to ''lots'' is '''infinite'''. |
||
| − | * When Lightning is set to ''lots'', lightning will strike every '''12–30 seconds'''. |
||
| − | * More information on the frequency of Hound attacks can be found [[Hound#Hound attacks in Sandbox Mode|here]]. |
||
| − | |||
| − | [[File:World Lop Always.png|thumb|left|300px|Land structure with the Loop option set to "always"]] |
||
| − | [[File:World Branch Always.png|thumb|300px|Land structure with the Branching option set to "lots"]] |
||
| − | {{Clear}} |
||
| − | |||
| − | ==Presets== |
||
| − | |||
| − | {| class="article-table" style="width: 650px; height: 200px; " border="1" cellpadding="1" cellspacing="1" |
||
| − | ! scope="col" style="text-align:center;" |Type |
||
| − | ! scope="col" style="text-align:center;" |Content |
||
| − | |- |
||
| − | | style="text-align:center;" |'''Default''' |
||
| − | | style="text-align:left;" |Default settings of the game. |
||
| − | |- |
||
| − | | style="text-align:center;" |'''Default Plus''' |
||
| − | | style="text-align:left;" | |
||
| − | At the start of the game, it spawns you with food and many useful items to quickly establish a base. However, resources around the map are scarcer and monsters are more numerous. Boons are also more common than in Default. |
||
| − | |- |
||
| − | | style="text-align:center;" |'''Lights Out''' |
||
| − | | style="text-align:left;" |Default settings of the game with a twist. Night is infinite, thus making survival much more difficult, spawns you with minimal supplies beside a Campfire. |
||
| − | |} |
||
| − | '''Default Plus''' will spawn three [[Chest]]s around the player, containing the following items: |
||
| − | #'''Food Chest''' |
||
| − | #*8 [[Meat]] |
||
| − | #*8 [[Berries]] |
||
| − | #*10 [[Seeds]] |
||
| − | #*2 [[Carrots]] |
||
| − | #*2 [[Pumpkins]] |
||
| − | #*2 [[Dragon Fruit]] |
||
| − | #*2 [[Eggplant]] |
||
| − | #*1 [[Tallbird Egg]] |
||
| − | #'''Item Chest''' |
||
| − | #*30 [[Cut Grass]] |
||
| − | #*20 [[Log]]s |
||
| − | #*10 [[Flint]] |
||
| − | #*30 [[Twigs]] |
||
| − | #*20 [[Rocks]] |
||
| − | #*10 [[Gold Nuggets]] |
||
| − | #*2 [[Gunpowder]] |
||
| − | #*6 [[Silk]] |
||
| − | #'''Tool Chest''' |
||
| − | #*1 [[Axe]] (100% durability) |
||
| − | #*1 [[Spear]] (100% durability) |
||
| − | #*1 [[Shovel]] (100% durability) |
||
| − | #*1 [[Hammer]] (100% durability) |
||
| − | #*1 [[Pickaxe]] (100% durability) |
||
| − | #*1 [[Backpack]] [[Blueprint]] |
||
| − | #*1 [[Straw Roll]] [[Blueprint]] |
||
| − | #*1 [[Divining Rod]] [[Blueprint]] |
||
| − | #*1 [[Gunpowder]] [[Blueprint]] |
||
| − | |||
| − | |||
| − | '''Lights Out''' will spawn a [[Campfire]] next to the player and a single [[Chest]] containing: |
||
| − | *6 [[Cut Grass]] |
||
| − | *3 [[Flint]] |
||
| − | *6 [[Twigs]] |
||
| − | *3 [[Logs]] |
||
| − | *1 [[Gold Nugget]] |
||
| − | *1 [[Axe]] (100% durability) |
||
| − | |||
| − | ==[[File:Reign of Giants icon.png|32px]]Reign of Giants== |
||
| − | In the ''[[Reign of Giants]] DLC'', in addition to some options in the vanilla game there are 17 more for a total of 64 customization options. The additional options are listed below in the order they appear in the World Settings screen. |
||
| − | |||
| − | {| class="article-table" style="width: 650px; height: 200px; " border="1" cellpadding="1" cellspacing="1" |
||
| − | ! scope="col" style="text-align:center;" |Type |
||
| − | ! scope="col" style="text-align:center;" |Icon |
||
| − | ! scope="col" style="text-align:center;" |Content |
||
| − | |- |
||
| − | | style="text-align:center;" |'''Length of Autumn''' |
||
| − | | style="text-align:center;" |[[File:Autumn.png|center]] |
||
| − | | style="text-align:left;" |Determines the length of the Autumn season. Available options are ''none, very short, short, default, long, very long ''and ''random''. |
||
| − | |- |
||
| − | | style="text-align:center;" |'''Length of Winter''' |
||
| − | | style="text-align:center;" |[[File:Winter.png|center]] |
||
| − | | style="text-align:left;" |Determines the length of the Winter season. Available options are ''none, very short, short, default, long, very long ''and ''random''. |
||
| − | |- |
||
| − | | style="text-align:center;" |'''Length of Spring''' |
||
| − | | style="text-align:center;" |[[File:Spring.png|center]] |
||
| − | | style="text-align:left;" |Determines the length of the Spring season. Available options are ''none, very short, short, default, long, very long ''and ''random''. |
||
| − | |- |
||
| − | | style="text-align:center;" |'''Length of Summer''' |
||
| − | | style="text-align:center;" |[[File:Summer.png|center]] |
||
| − | | style="text-align:left;" |Determines the length of the Summer season. Available options are ''none, very short, short, default, long, very long ''and ''random''. |
||
| − | |- |
||
| − | | style="text-align:center;" |'''[[Frog Rain]]''' |
||
| − | | style="text-align:center;" |[[File:FrogRain.png|center]] |
||
| − | | style="text-align:left;" |Determines the frequency of Frog Rain.<br />Available options are ''none'', ''less'', ''default'', ''more'' and ''lots''. |
||
| − | |- |
||
| − | | style="text-align:center;" |'''Smoldering/ Wilting''' |
||
| − | | style="text-align:center;" |[[File:Smoldering.png|center]] |
||
| − | | style="text-align:left;" |Determines the rate at which objects start smoldering and/or the rate at which crops wilt.<br />Available options are ''none, less, default. more ''and ''lots''. |
||
| − | |- |
||
| − | | style="text-align:center;" |'''[[Tumbleweed]]s''' |
||
| − | | style="text-align:center;" |[[File:Tumbleweeds.png|center]] |
||
| − | | style="text-align:left;" |Determines the amount of naturally spawning Tumbleweeds.<br />Available options are ''none'', ''less'', ''default'', ''more'' and ''lots''. |
||
| − | |- |
||
| − | | style="text-align:center;" |'''[[Mini Glacier]]''' |
||
| − | | style="text-align:center;" |[[File:MiniGlaciers.png|center]] |
||
| − | | style="text-align:left;" |Determines the amount of naturally spawning Mini Glaciers.<br />Available options are ''none'', ''less'', ''default'', ''more'' and ''lots''. |
||
| − | |- |
||
| − | | style="text-align:center;" |'''[[Cacti]]''' |
||
| − | | style="text-align:center;" |[[File:Cacti.png|center]] |
||
| − | | style="text-align:left;" |Determines the amount of naturally spawning Cacti.<br />Available options are ''none'', ''less'', ''default'', ''more'' and ''lots''. |
||
| − | |- |
||
| − | | style="text-align:center;" |'''[[Moleworm]]''' |
||
| − | | style="text-align:center;" |[[File:MolewormsIcon.png|center]] |
||
| − | | style="text-align:left;" |Determines the population of [[Burrow]]s and/or the amount of Moleworms spawning.<br />Available options are ''none'', ''less'', ''default'', ''more'' and ''lots''. |
||
| − | |- |
||
| − | | style="text-align:center;" |'''[[Buzzard]]s''' |
||
| − | | style="text-align:center;" |[[File:Buzzards.png|center]] |
||
| − | | style="text-align:left;" |Determines the amount and/or the spawn rate of Buzzards.<br />Available options are ''none'', ''less'', ''default'', ''more'' and ''lots''. |
||
| − | |- |
||
| − | | style="text-align:center;" |'''[[Catcoon]]''' |
||
| − | | style="text-align:center;" |[[File:Catcoons.png|center]] |
||
| − | | style="text-align:left;" |Determines the population of [[Hollow Stump]]s and/or the amount of lives Catcoons have.<br />Available options are ''none'', ''less'', ''default'', ''more'' and ''lots''. |
||
| − | |- |
||
| − | | style="text-align:center;" |'''[[Volt Goat]]''' |
||
| − | | style="text-align:center;" |[[File:VoltGoats.png|center]] |
||
| − | | style="text-align:left;" |Determines the population of Volt Goats, possibly affecting their breeding. Available options are ''none'', ''less'', ''default'', ''more'' and ''lots''. |
||
| − | |- |
||
| − | | style="text-align:center;" |'''[[Varg]]s ''' |
||
| − | | style="text-align:center;" |[[File:Vargs.png|center]] |
||
| − | | style="text-align:left;" |Determines the likelihood of a Varg being tracked down instead of a Koalefant when following animal tracks.<br />Available options are ''none'', ''less'', ''default'', ''more'' and ''lots''. |
||
| − | |- |
||
| − | | style="text-align:center;" |'''[[Hound Mound]]''' |
||
| − | | style="text-align:center;" |[[File:HoundMounds.png|center]] |
||
| − | | style="text-align:left;" |Determines the amount of naturally spawning Hound Mounds. Available options are ''none'', ''less'', ''default'', ''more'' and ''lots''. |
||
| − | |- |
||
| − | | style="text-align:center;" |'''[[Poisonous Birch|Poison Birchnut Tree]] ''' |
||
| − | | style="text-align:center;" |[[File:PoisonBirchnutTrees.png|center]] |
||
| − | | style="text-align:left;" |Determines the rate at which [[Birchnut Tree]]s become angered. Available options are ''none'', ''less'', ''default'', ''more'' and ''lots''. |
||
| − | |- |
||
| − | | style="text-align:center;" |'''[[Bearger]]''' |
||
| − | | style="text-align:center;" |[[File:BeargerIcon.png|center]] |
||
| − | | style="text-align:left;" |Determines the spawn rate of Bearger.<br />Available options are ''none'', ''less'', ''default'', ''more'' and ''lots''. |
||
| − | |- |
||
| − | | style="text-align:center;" |[[Moose/Goose|'''Moose/Goose''']] |
||
| − | | style="text-align:center;" |[[File:MooseGoose.png|center]] |
||
| − | | style="text-align:left;" |Determines the spawn rate of Geese.<br />Available options are ''none'', ''less'', ''default'', ''more'' and ''lots''. |
||
| − | |- |
||
| − | | style="text-align:center;" |'''[[Dragonfly]]''' |
||
| − | | style="text-align:center;" |[[File:DragonflyIcon.png|center]] |
||
| − | | style="text-align:left;" |Determines the spawn rate of Dragonfly.<br />Available options are ''none'', ''less'', ''default'', ''more'' and ''lots''. |
||
| − | |} |
||
| − | * Autumn and Spring last 20 days in ''default'', 12 in ''short'', 5 in ''very short,'' 30 in ''long ''and 50 in ''very long.'' |
||
| − | * Winter and Summer last 15 days in ''default'', 10 in ''short'', 5 in ''very short,'' 22 in ''long ''and 40 in ''very long.'' |
||
| − | * Giants set to ''less'' will have a 33% chance to spawn, while the ''default'' is 67%, ''more'' is 100%, and ''lots'' allows them to spawn in any season. |
||
| − | |||
| − | =={{Pic|32|Blueprint}} Gallery== |
||
| − | <gallery captionalign="center"> |
||
| − | Lots.PNG|Appearance of the Map with the Grass and Rocks settings set to "Lots". |
||
| − | berries!.png|Appearance of the world with the Berry Bushes and Carrots settings set to "Lots". |
||
| − | Default.jpg|The customization interface. It is at the default setting. |
||
| − | Lights Out.jpg|Starting a world in the "Lights Out" (permanent night) preset. |
||
| − | World lots.jpg|[[Woodie]] in a world with all settings set to "Lots". |
||
</gallery> |
</gallery> |
||
| − | |||
| − | =={{pic|32|Placeholder}} Trivia== |
||
| − | * Although they are valid monsters in-game, the customization interface does not allow the player to tweak the appearance of [[Mosquito]]es. |
||
| − | * Setting objects to "''None''", will '''not '''prevent them from spawning in Set Pieces, such as trees around Maxwell's Door. |
||
| − | |||
| − | =={{pic|32|Mosquito}} Bugs== |
||
| − | * If your character spawns near monsters after world generation, they can attack you before Maxwell finishes his intro speech. (Verified with Tallbirds.) Clicking will allow you to skip Maxwell's speech and react accordingly. |
||
{{Gameplay}} |
{{Gameplay}} |
||
| − | [[pl:Tryb Sandbox]] |
+ | [[pl:Tryb Sandbox]] [[fr:Mode Survie]] |
Revision as of 23:42, 22 February 2019
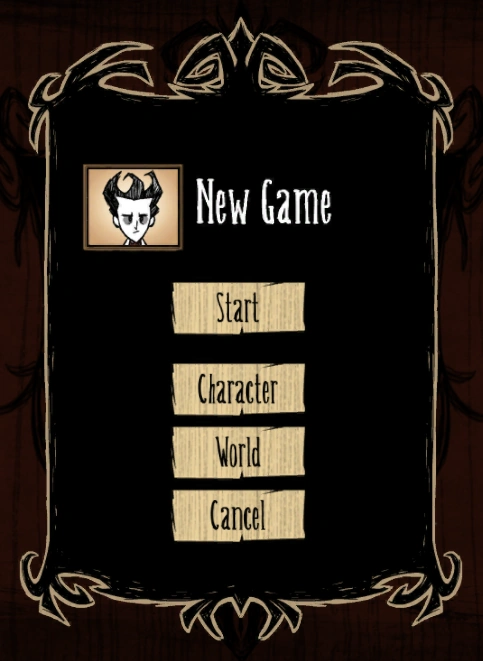
Beginning a new game puts the player in Survival Mode
Survival Mode is the default game mode in Don't Starve. Players enter Survival Mode when starting a new world. Each new world is randomly generated, and can optionally be customized before the world is created, specifying various options like frequency of Hound attacks or the occurrence of Seasons. When the player enters the world, their character is greeted by Maxwell, telling them to find some food before night comes.
There is no preset goal in this mode, aside from survival. Players can choose to gather Things randomly placed around the world, and build the portal to another survival world, keeping their knowledge and items that they can carry on them, but sacrificing the existing world. In order to enter Adventure Mode, the player must find Maxwell's Door, which is located in a random location in each world, though usually quite far from where the player first spawned.
 Pictures
")