| This page provides an overview of Adventure Mode only and should not contain major spoilers. For detailed descriptions of each level and strategies on completing Adventure Mode, please visit: Guides/Adventure Guide |
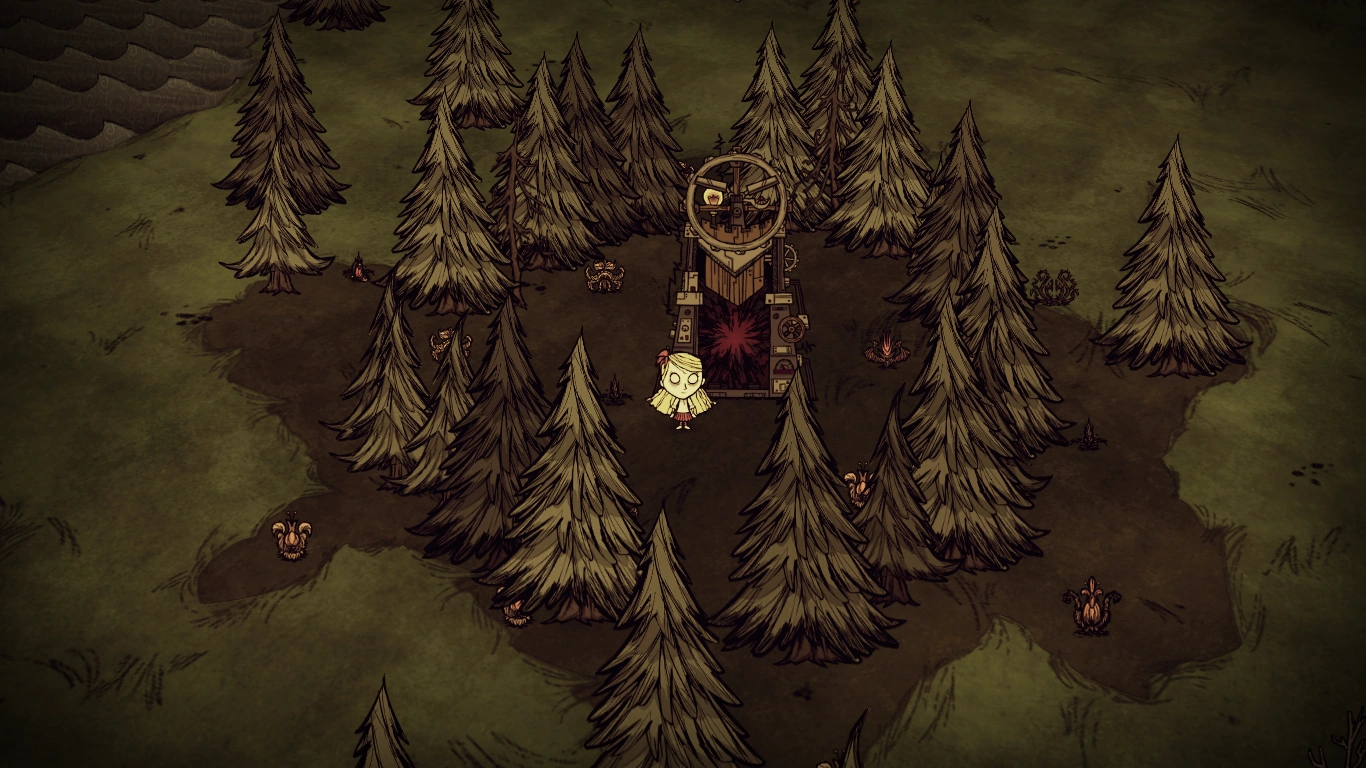


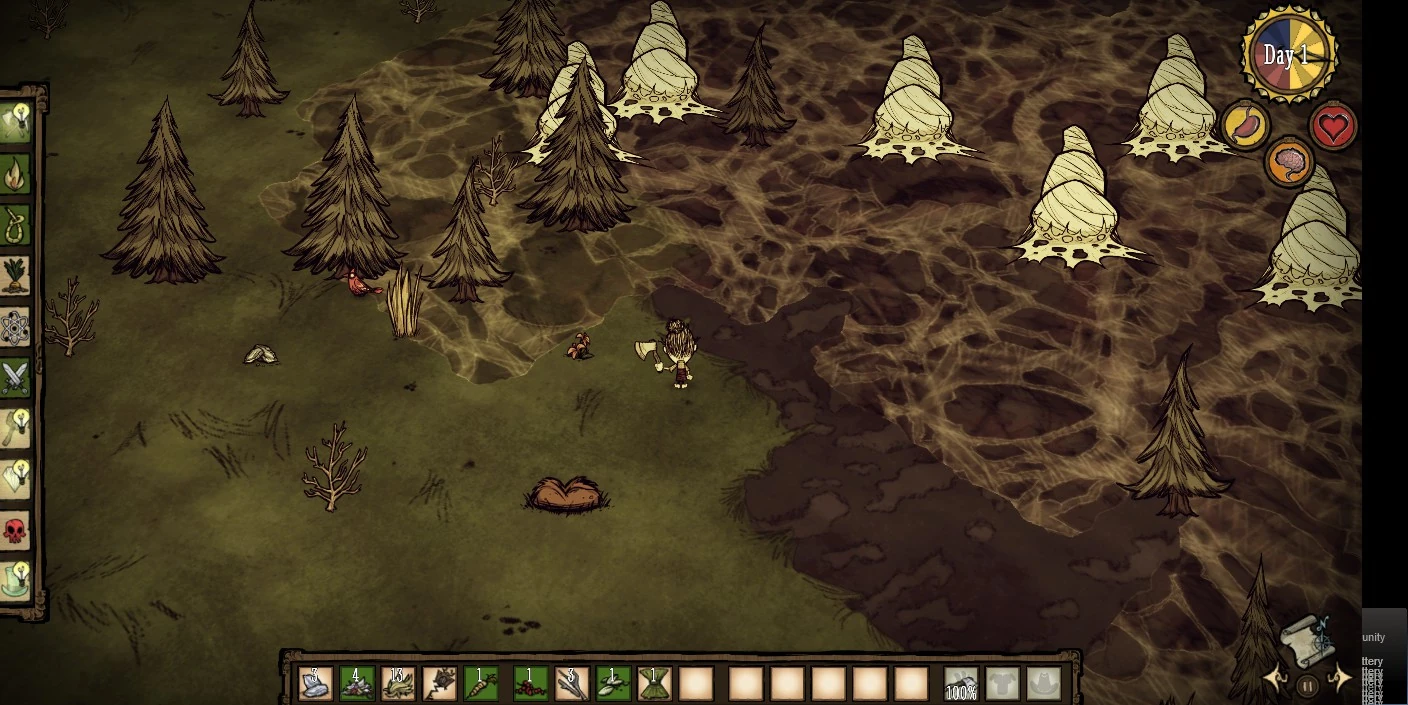
Screen view at the start of a chapter.
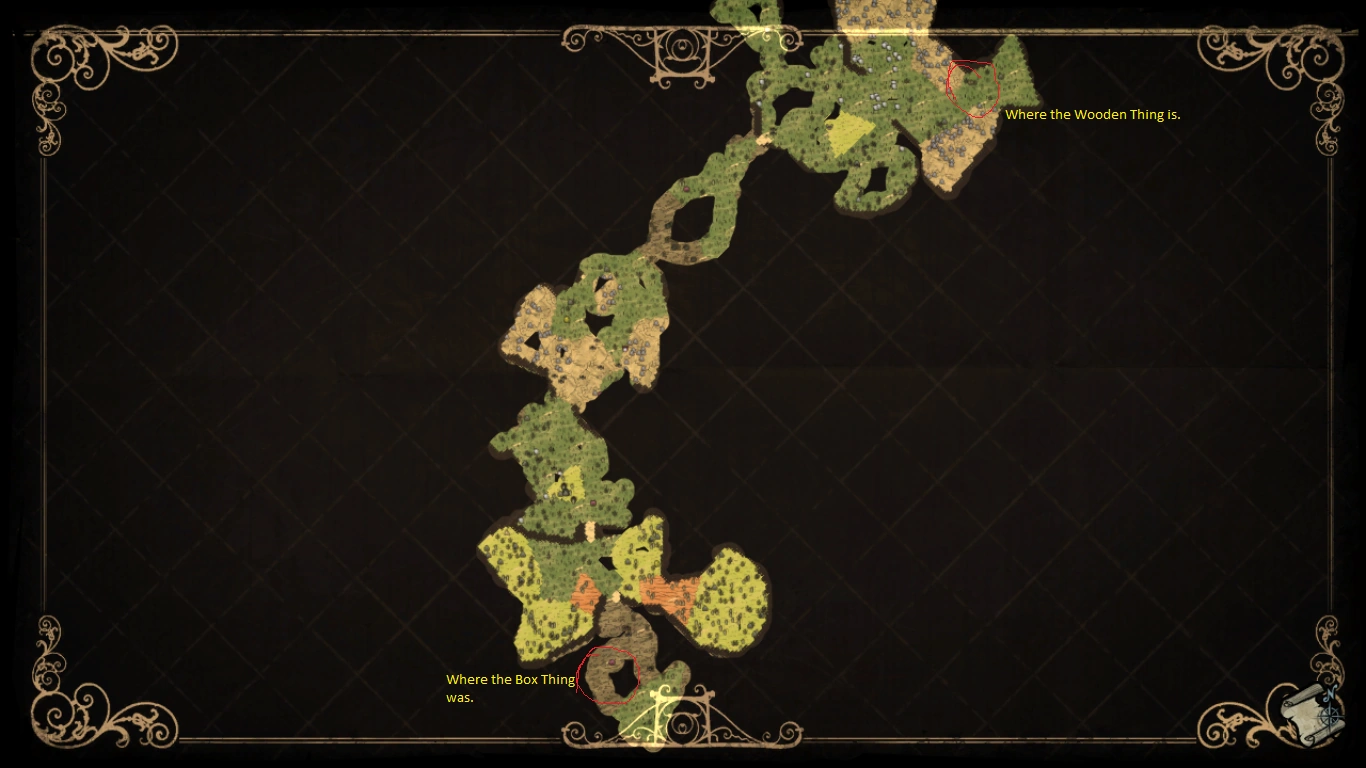

Picture of world 3 showing how far away certain parts can spawn from the Wooden Thing.
Adventure Mode is the story mode of Don't Starve. In Adventure Mode, the player enters a battle of wits and endurance against the game's mastermind, Maxwell. The world is split into successive chapters with their own themes, introduced by Maxwell. The objective of each chapter is to survive, gather all four pieces of the Wooden Thing, assemble it, and activate it in order to progress to the next chapter.
Players can take up to four items of their choice with them when teleporting between chapters. Wilson's Beard does not count as an item, so it is maintained. WX-78's stat increases from eating Gears also is carried over between chapters. Any character-specific item will also be replaced, meaning you do not have to bring them with you. Also, any built but not yet placed structures will carry over with the player, ready to be deployed in the next world.
Entering Adventure Mode
The player reaches Adventure Mode from Sandbox Mode by activating Maxwell's Door. The player is not allowed to bring anything over from Sandbox Mode (including learned recipes). If the player dies in Adventure Mode, they will wake up in Sandbox mode in the same state as they left it; the player can then immediately try again if they wish. Visiting Adventure Mode always starts the player at the very first chapter and a newly generated map, irrespective of previous attempts.
Worlds
At the start of each level and every time the player loads up an Adventure game the title of the level is displayed and the number of chapter. The length of Adventure Mode is 5 chapters plus an Epilogue. The order of appearance for most worlds is chosen at random. However, in the 3rd, 4th, and 5th world, the map will show some of the path indicating where the objectives are. A world only appears once in an Adventure play-through, but there are more worlds than chapters, which means that some worlds may not appear. There are 72 possible combinations of these 5 levels.
For more tips on every chapters, please check Guides/Adventure Guide.
Warning! The following text contains spoilers about the Adventure Mode worlds. It's always more fun to explore them yourself.
A Cold Reception
- May appear on chapters 1 - 3
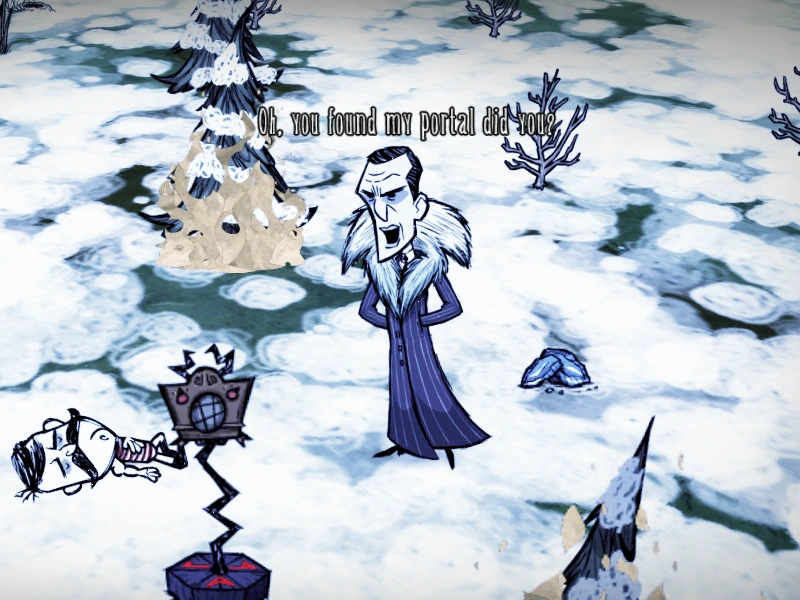

"Oh, You found my portal did you? You'd think you would have learned your lesson by now. Hmm. Let's try something a little more challenging, shall we?"
— Maxwell greeting the player
A Cold Reception is similar to a Sandbox world, except the seasons change very quickly. A rainy 6 days of summer followed by a snowy 3 of winter makes exploration difficult. In addition, daytime will never exceed one third of the day, and significantly less during winter. Players are more vulnerable to insanity and freezing as you have to face near-constant rain or snow and much less daylight. Due to the seasons being so short, it is unlikely to see a Deerclops in the first several winters.
There will always be at least one resource which is very rare. Sometimes the level generated will not have many Saplings, but a lot of Spiky Bushes instead; other times, Grass might be either scarce or there might be plenty, but they're all pre-picked and need to be fertilized. This makes it difficult to survive the winter with Traps. Also, there might be no Trees, only stumps everywhere. Your food sources are limited; there are few Berry Bushes (if any) and Carrots can be rare. Further, when farming Berry Bushes and other plants, there will be a far greater chance of an unfortunate lightning strikes (due to the near-constant rain), so Lightning Rods are a necessity.
All in all, this level should feel similar to a survival level, but with increased pressure on all of the player's resources. At least one Thing will be on an island connected by a bridge that serves as a Guardian Pig checkpoint, which can make it quite tough to get through. However, this means that players will find a Pig King on the island. The constant rain means that players will most likely be getting quite a lot of Frog Rain at first, but players can use them to their advantage, as they make the most abundant food source in this level.
Tips:
- If this is your first level try to learn as many Recipes as you need, because you will keep them through the Adventure Mode.
- It's important not to attack Frogs when others are nearby, as all of them will chase and attack you. Try to kite the Frogs until they give up chasing you.
- Alternatively, you can trap Frogs and they will be a consistent food source. Other Frogs in the area will not aggro when you trap them provided you do not attack them.
- If this is not your first level, prepare a Farm (in the previous level) to place, as the plentiful rain makes crops grow incredibly fast.
- Keep in mind that Straw Rolls and Tents are very useful to skip the night and replenish Sanity level during this mode. However, it is important to remember that sleeping restores sanity at the cost of Hunger and is not highly recommended due to the scarcity of food sources.
- You will find the following sources of food on this level: lots of Rabbit Holes; Tallbirds, Frogs and Beefalos. Keep in mind that Tallbirds generally fight Frogs and if one does not die to Frogs, kiting and killing it is a good way to get Meat, Tallbird Eggs, and Frog Legs. Keep in mind that killing most of these increase Naughtiness, so be wary of Krampus!
- There are several areas that are blocked off by Spider Dens. Building 6 or more Traps and luring wave after wave of Spiders into it is a good way of cleaning them. Another way is to attempt to burn the Spider Dens down, but this is only recommended when the Spider Dens are in a Forest, where you would first light a tree on fire. You can also run in, plant a Pine Cone as close to the den as possible, then return when it is grown and light fire on it. If you've just started and your area does not provide resources to make Traps, you can try and run through the Spider Dens at the cost of Health and Sanity.
- It is possible to travel to Archipelago, The Game is Afoot, or King of Winter, which has an infinite Winter. Taking with you Rabbit Earmuffs (worst), Winter Hat (okay), or Beefalo Hat (best) will help greatly in those levels.
- Keep on your feet during the day and evening, stopping only to pick up food and the bare minimum for tools. Use every other night to set a campfire by the trees so players may chop trees and cook carrots. Between those nights, keep moving by Torch, using the reduced vision to gather Twigs and Cut Grass, and to shave Beefalos. Make a base only if this is your first world and you need to prototype useful items, or if it is the 4th one and you want to prepare for the next world.
- An Umbrella is highly recommended because your Sanity will drop very very quickly due to the near constant Rain.
- With rain comes lightning, so WX-78 will have trouble with sanity unless using an umbrella. Carry cooked Green or Blue Mushrooms, picked on dusk and night.
- Consider gathering Flowers and using them to craft a Garland. Picking Flowers will restore Sanity and Garland will help combat Sanity loss due to Rain and foregoing sleep for the first few days. If you manage to get a Science Machine and x6 Silk then you will be able to craft a Top Hat, which restores 3.3 Sanity/min. Rain drains 3.3 Sanity/min., so it makes 0 Sanity loss.
- A quick and easy (but risky) way to get past blocked off areas such as the Pig Guardian checkpoint is to place 1 cut grass or 1 twig next to the wood wall and light it up with a torch.
- As the rain is frequent during summer, more combustible material is needed to maintain fire. Charcoal stacks up to 40 and will be in great supply when the large forests catch fire due to the of lightning strikes.
- When trying to find the Things, if you are on an island-like landform, walk around all the edges of it with the divining rod as you have a good chance to pick up a signal without having to explore too much of the island. This does NOT work if the island is too large.
King of Winter
- May appear on chapters 1 - 4
"Well, would you look at that, you survived. One down, four to go!"
— Maxwell greeting the player
Players are spawned in a Grasslands Biome. Maxwell informs that endless winter has already begun, burning trees are around players to prevent from freezing while players hearing Maxwell's dialogue. Players can look forward to 1.5–3 minutes of daytime while juggling the ever-present effects of freezing, starvation, and insanity in this harsh climate. On the other hand, nights do not last long in this world. It also introduces Hound Mounds, identified by animal Bones on the ground. These are usually on a small area or island of their own, guarding a location on the map forcing players to go through if players want to get all the pieces. Deerclops seems to spawn on day 7 to 9. If players ignore him and leave him somewhere, it will prevent him from respawning somewhere closer. However, his eye can help players gain Hunger and Health back while also reducing your sanity if you need to go through some Obelisks. This may not be worth the risk in the earlier days, unless you have brought a durable Log Suit and Football Helmet combination to shield from damage.
The journey will be blocked by a group of Boulders or Obelisks. For the latter, players may need to have a certain level of sanity (either low or high level) in order to pass through the Bridges.
The world is permanently set to winter. The aim is to survive the cold without any preparation time. Do not try to stay here for long; find a place on the first 2 to 3 days to collect as many items as possible and get some food but then just go exploring as quick as you can to find the rest of the pieces.

This is one of the more difficult levels to start in because players initially have no way of keeping warm except for the Heat Stone, which isn't very effective. It is not a bad idea to stay here a little bit longer to prepare for the levels ahead. Getting the Tam o' Shanter is very helpful to raise your sanity back up when players have to go insane to get through the Obelisks.
Near the start location will be a dead adventurer with a backpack containing a schematic for one random invention, a Heat Stone, some Logs, Cut Grass, Twigs and a Torch. Sometimes the backpack may also contain a Red Gem and several Nightmare Fuels. Also, lying nearby is a schematic for Rabbit Earmuffs, a Divining Rod, Logs and an Axe.
General Tips:
This is a very difficult level and it might take you more than 3 tries to pass this. It depends on the number of obelisks crossing you will get in the level, also the type and amount of natural resources available (e.g. Rabbits may not be present at all, or limited grass in a sector).
- Because Obelisks will block your passage, it's important to know how to pass through them. There are 2 types of Obelisks. One requires you to have high Sanity, another requires you to have low Sanity. You will need 15% maximum sanity (30 for most characters) or lower to pass through the low one.
- Reduce Sanity by collecting (-5), eating (-5) or standing nearby (-25/min) Evil Flowers/Dark Petals, eating Raw Meat (-10), eating Cooked Monster Meat (-10), digging up graves (-10), eating raw Green Cap (-50), and more. Refer to Sanity list.
- Restore Sanity by picking up Flowers (+5), and eating Cooked Green Cap (+15) at the price of -1 Health. If you have enough Monster Meats/Meats, befriending a Pig will help increase sanity (+25/min).
- Accumulation of Green Mushrooms is highly suggested before crossing a low sanity Obelisks so that you can cook to quickly restore sanity.
- Timing is important when moving between 'sectors' that are split off by low level sanity Obelisks. Make sure you gather enough resources in case the new sector is lacking a particular resource (e.g. Boulders) and if you are unable to return to the previous location; as being insane can make it more difficuit with Crawling Horror threats.
- If you happen to start in or find a 'rich' resource area, you might want to consider staying in the area for a while to gather all its resources before moving to the next sector. Don't rush!
- It is best to stand near a fire source until the Heat Stone is charged to max. When it is charged to max, it will turn orange in color. This will give you more time to explore before building a fire.
- If you have problems finding Boulders, remember that those can be found in small numbers in the Forests. Also, Gold Nuggets can be scattered around Graveyards or near big amounts of Spider Dens.
- If you reach a choke point with Hound Mounds scattered around, two of the ways to get through them is by using a Beefalo Horn to lure beefalos and distract the hounds while you destroy the mounds or flat out running, avoiding the hound's attacks until you reach a place where the hounds stop following you (it is useful to wear a feather hat, as this will attract birds which will take the hounds interest for a short time).
- Hounds from Hound Mounds, Tallbirds, and even Deerclops can also be taken out with use of Tooth Traps and the kiting method.
- Obtaining the Tam o' Shanter can be tricky due to the long range of MacTusk's darts and the fast speed of his hounds. The best approach to the group is to lure the hounds away and deal with them separately from MacTusk and his son, analyze if any healing is necessary, then going back to fight MacTusk. You may need to try several times, as the hat has merely a 25% drop rate. It is the best hat in the game to wear for regaining sanity and also helps with warmth, making it a worthy endeavour.
Food/Resource Tips:
- Berry Bushes, Grass and other renewable resources no longer respawn. Plan accordingly when you use up an area's resources!
- If Grass is scarce, try to pick up as many as you can and use sparingly. Since the level has only winter, Logs and Grass are needed all the time to make Campfires. An alternative way to quickly get warm is to use a Torch to burn stray trees (so it won't spread) and Manure (if available). Manure can be collected and used to fuel camp fires. A great approach, if rocks are in good supply, is to build Fire Pits. These require no grass to build and are permanent.
- If there are Rabbits try to catch them with a Trap. Use Carrots to bait, or (preferred) 'guide' it towards the trap by placing it near the rabbit's home entrance so that it runs into the trap. 2 Rabbits and 1 twig are needed for Rabbit Earmuffs.
- If there are no Rabbits on the map, hunting for Koalefants will provide 8 Meat which is more cost effective than hunting for Beefalos. However, Koalefants are also time consuming to locate and they hit a bit harder than Beefalos. It is advisable to have Armor and a Ranged Weapon when hunting.
- Try to make a Crock Pot as soon as possible as it is more effective to fullfil your hunger and sanity.
- Remember to collect Monster Meat since it can be used to make Pigs follow you. They can be a great help fighting against MacTusks and other aggressive animals. Beware, feeding them 4 Monster Meats in total turns them into Werepigs. It is also helpful to use Monster Meat in Crock Pot recipes.
The Game is Afoot
- May appear on chapters 1 - 4
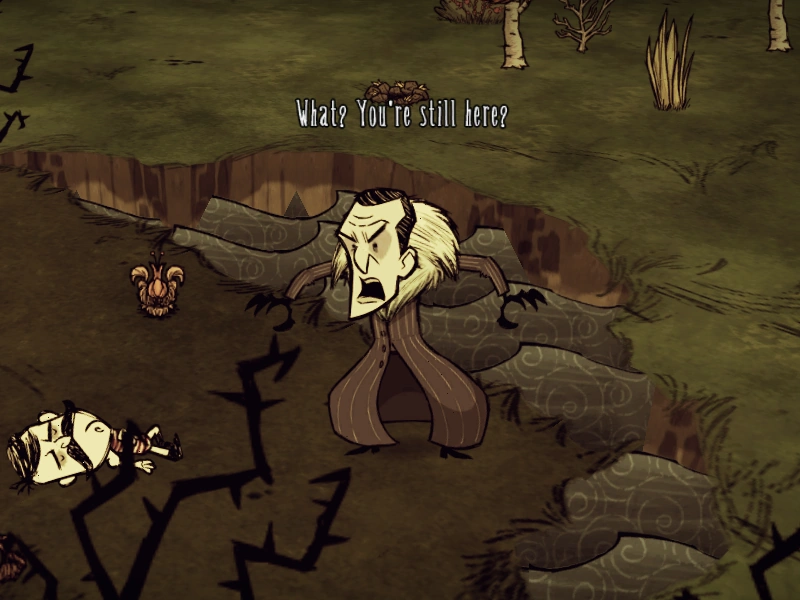
"What? You're still here? Impressive, but you should probably stop while you're ahead."
— Maxwell greeting the player
Players are spawned on the ground of a Marsh surrounded by normal Grassland. The player will spawn near a chest usually containing 7 Logs, a Winter Hat and 3 Flint. On a rare occasion the chest may contain 10 Rot and 4 random Blueprints. Sometimes the Chest is spawned near a Campfire and can be ignited immediately, costing the player the items inside. Seasonal cycles are not present in this world. The world begins in winter, and will turn to endless summer (Spring in Reign of Giants) after 10 days. Periodic Hound Attacks begin in this world.
The world features a resource-rich central island, surrounded by dangerous lands containing each of the Teleportato Things. Eventually the outlying islands should be quite inhospitable. There is the possibility of an island being completely cut off from the rest of the world, requiring players to find a Wormhole to get to it.
Tips:
Players will see various structures and blockades in this world. Players are advised to move quickly and be well equipped before walking through those blockades.
- If this is your first level try to learn as many Recipes as you need, because you will keep them through the Adventure Mode.
- It is possible to travel to Archipelago (Starts early summer with normal seasonal cycle) or King of Winter (has permanent Winter). Taking with you Rabbit Earmuffs (worst), Winter Hat (okay), or Beefalo Hat (best) will help greatly in those levels.
- In general, this level is very easy if you know how to deal with blockades. Care should be taken in the first 10 days of winter though.
- Blockades on the Bridges and the ways to deal with them:
- Keep in mind that you don't have to kill everything in your way (unless you want to)
- Tier 3 Spider Dens - building 6 or more Traps and luring wave after wave of Spiders into it is the way to clean it. If you have just started and your area does not provide resources to make Traps, you can try and run through the Spider Dens at cost of Health. Or, there are usually a lot of Trees among the dens. You can light them with a Torch and if they are near enough to the dens, both will burn, leaving the Spiders to be picked off without renewing. You can also run in, plant a Pine Cone and wait until it is grown the next day although this results in more Spider attacks and lower Health.
- Hound Mounds - just run away from them, because generally Hounds are not fast enough to catch you.
- Tallbird Nests - just wait for Dusk or Night to run through the area, because during this time the Tallbirds sleep.
- Killer Bee Hives - wearing Beekeeper Hat will reduce 80% of incoming damage from Killer Bees. If you feel that you need more protection add a Grass Suit(weak) or Log Suit(okay) for extra protection.
- A square of Clockwork Monsters - easiest way is to run through the area with Grass Suit(weak) or Log Suit(okay) and Football Helmet(if your map has Pigs or if you manage to find a Crank Thing and turn the Pig that will always spawn near it into a Werepig. The Pig Heads near a Touch Stone will give you up to 8 Pig Skins, too). Other ways to do it is to use Beefalo Horn and clean up with Beefalos or use a Spiderhat and clean up with Spiders.
- Swamp blockade is the hardest, because you will have to dodge the Tentacles. It's advised to have full Health, a Log Suit, and a Football Helmet before going into the area.
- Ideally have a lot of Healing Salves and/or Honey Poultices to restore Health to full. Getting the Healing Salve is easier, because all you have to do is trap a lot of Spiders, it's safer than running through the Swamp and picking up Reeds and getting Honey.
")
")
")
")
")
")
Archipelago
- May appear on chapters 1 - 4
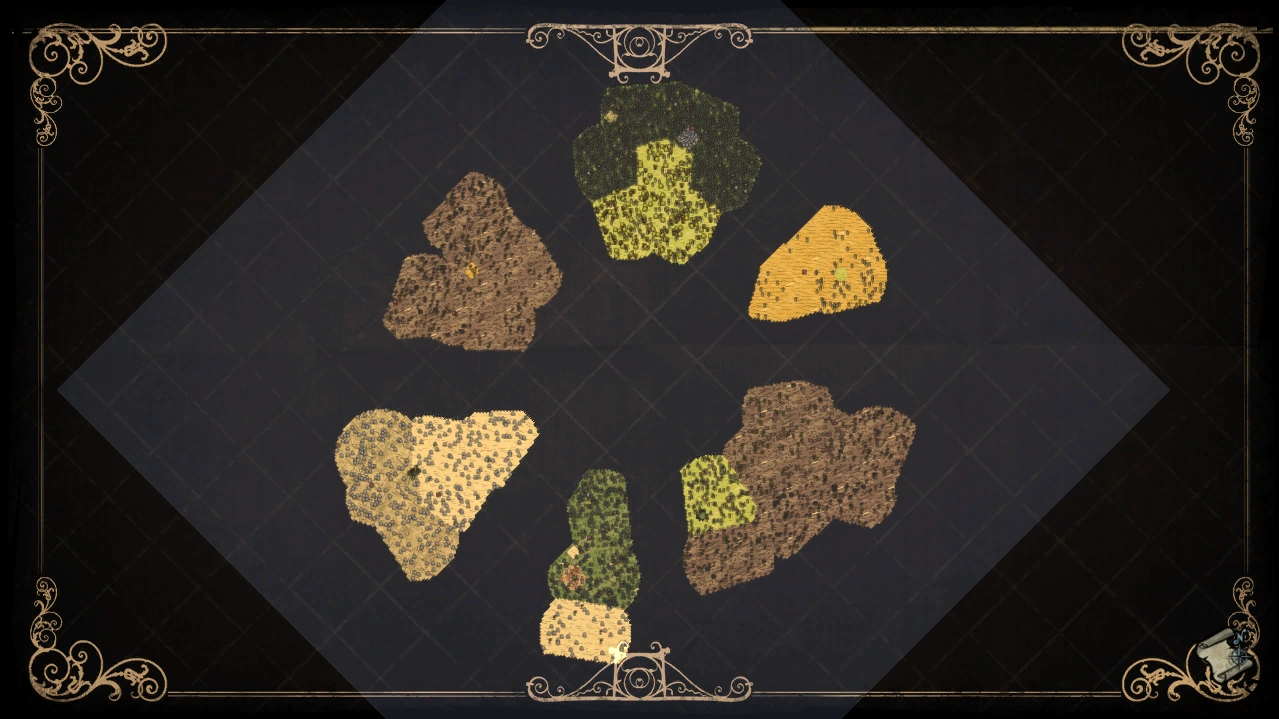
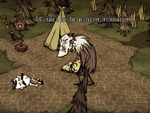
The map for an archipelago level
Wickerbottom in Archipelago, by some tier 3 Spider Dens and a Worm Hole.
— Maxwell greeting the player
Players are spawned on one of six islands. The only way to get to other islands are by Worm Holes.There is one Thing on each island; except on the island you begin. One island may contain one or more worm holes that split off to mulitple islands. It is likely you may need to return to the previous island(s) after collecting one piece of the Thing in order to set up the Teleportato at the Wooden Thing.
The season begins at the start of spring and will gradually change over time similar to sandbox mode. Each island is dominated by mostly one or two biomes. The islands are placed in a circular shape, and while the shape is no indication of the order the wormholes will travel in, each island always has the same two biomes, each time you try Archipelago.
The starting island has a small square shaped biome full of Carrots, Grass, Saplings, and Berry Bushes, and the rest of the island is dominated by a massive Swamp filled with Spider Dens, Tentacles, and Merms.
Tips:
- It is suggested that the first Forest biome you see you get enough Logs, Cut Grass, Twigs, and Flint to survive for a long while, because you won't be seeing some of the resources in the forest biome again.
- It is recommended that players establish a way to come back from or cope with insanity, since it is inevitable that you will be traveling via wormholes quite often.
- Usually, two of the six islands are Swamps. It can be very useful to stick around when Merms and Spiders fight Tentacles, as this gives you a free grinder. If the Tentacles die, you get a weapon. If the Merms die, you get Fish and Frog Legs which you can use to make Fish Sticks or Meatballs. If the Spiders die, you get free Silk and Spider Glands. Just be sure that nothing tries to kill you while picking up the loot.
- Spend the first day grabbing everything you can in the starting biome, especially food and flowers. Food is scarce on the other five islands, and there is a high insanity risk too.
- Each island may have a particular set of creatures according to the biomes.
- Starting and 2nd island: Swamp Biome has Merms, Spiders, Mosquitoes and Tentacles.
- 1 island: Grassland/Forest Biome has Killer Bee Hives, Bees, Spiders.
- 1 island: Rockyland Biome has Tallbirds.
- 1 island: Rockyland/Forest Biome has Spiders and Hound Mounds.
- 1 island: Savanna Biome has Beefalo, Spiders and usually the usual creatures near the Wooden Thing.
- When using the wormhole it is possible that you will travel into a middle of a field of Killer Bee Hives, Spiders, or aggressive creatures so be prepared to run to safety.
- You can destroy the hives/mounds with ranged weapons and fires, especially fire darts due to the abundance of trees (Charcoal) and Swamps (Reeds). (Not Advised as it is time and resource consuming; the objective is to locate the Things)
- If possible, bringing a Walking Cane from the previous level is helpful to kite aggressive creatures, pass through swamps with tentacles, and to locate the Things.
- If this is your fourth level, be prepared for the final stage; Darkness as it is quite difficult.
Two Worlds
- May appear on chapters 3 - 4

"Say. pal. Let's make a deal. You can stay here. Settle down, even. I'll give you food, gold, pigs, whatever you need. All I want in return is a truce."
— Maxwell greeting the player
The character awakens on ground made of Cobblestones surrounded by a Fire Pit, a Tent, Trees, Berry Bushes, and Carrots. Maxwell materializes to ask the player for a truce, provided you stay there. Seven out of eight minutes are daylight on the large mainland where you start. In addition, there are no Things on this land.
In order to locate the Things you must travel through Worm Holes that connects the mainland to the secondary land. There are two types of Worm Hole; One is the normal Wormhole you encounter in sandbox mode, and the other is Sick Worm Hole that can only be used for a one way trip.
When on the secondary island, certain parts of the biomes will cause the day/night cycle to turn from 7 out of 8 minutes day to a more normal cycle, about 3–4 minutes daylight out of 8. (E.g. Walking/traveling through worm hole from a grassland to a swamp biome will cause the time shift). Take care of the time when travelling between biomes as the time change may make it dark faster than you expect.
Tips:
- The mainland should have plenty of food and since daylight is much longer, respawn rates from berry bushes and other plants are faster.
- The secondary island has a range of aggressive creatures. Take caution.
- If this world appeared on chapter 3, it is recommended that you bring winter gear with you to the next world, as it is possible for 'The Game is Afoot' or 'King of Winter' to appear in chapter 4 if they haven't appeared before.
- If this world appeared on chapter 4, it is recommended that you bring a stack of fireflies (for a Miner Hat) and a lot of food (Jerky or Honey because of long-term storage), as the next world will be in permanent night and scarce on food. Use this chapter as a chance to prepare for the challenging level 'Darkness'.
Darkness
- Always appears on chapter 5


"You insolent, pitiful, insignificant ant! Do not arouse the wrath of the great Maxwell! You will regret coming any further..."
— Maxwell greeting the player
Chapter 5 has several modifiers making it the end of the journey for all but the most well-prepared players. The player spawns with a bunch of Campfires and Fire Pits surrounding you and there will be a backpack nearby which has schematics for the Miner Hat, a healthy stack of grass, a stack of logs, two random items, and an extra random blueprint .The level's Day-night cycle has only permanent night, thus players have to survive and find the Things in complete darkness. Since there is no day light, most creatures are asleep, crops won't grow and other plants may take longer to replenish themselves, and most importantly, your sanity continuously declines over time. To make things worse, due to chronic low sanity, building life-saving camp fires will often attract Night Hands that will attempt to put out the light (note: they also decrease sanity when you are near them).
There are almost no food resources for you to collect and your only source of natural light is Maxwell's Lights scattered around the map. Now, those might sound like a lot but they're really not going to help you much if you didn't come prepared yourself. The map is a linear progression where each Biomes are connected by a bridge (slightly similar to the ones in "King of Winter") that might be blocked by Boulders ; make sure you have a Pickaxe or gunpowder ready to blow through them. There is a chance that the bridge might be blocked by Obelisks. Each area has a Thing so make sure you find it before moving onto the next Biome.
There are Pigs sleeping on the map which you can kill for meat, however with their kiting A.I. they can be a bit tricky. There is a chance you will find Tallbirds in this map which are in your best interest to try and kill if you are comfortable dodging their attacks, especially if they have laid an egg. Koalefant is also quite worth it. There are Maxwell Lights positioned around the map that turn on when you get near them; use them as an opportunity to take out the Divining Rod to see if you're getting closer to the pieces. Cooking Mushrooms along the way can prevent you from becoming insane e.g. Cooked Blue or Green Caps that restores sanity. However, note the dual uses of Blue Mushroom which can be eaten raw to replenish hunger and health at the expense of sanity which can be a life saver in certain situations.
Tips:
- In order to build a Miner Hat it is HIGHLY recommended that you unlocked the Bug Net from the previous level so you can catch Fireflies. This will save grass and twigs from making torches. Bringing a stack of gold from the previous level is helpful. The greater light radius provided by the Miner Hat can be critical to survival when traveling through Tooth Trap fields and Hound Mound areas.
- Only build camp fires to cook your food, but you must hurry as Night Hands would put it out. It is not advised to stop them, as they will continuously attack the fire (due to permanent darkness) and also decreases your sanity(just put on the Miner's Hat and walk towards them constantly until they vanish).
- You may need to build a Log Suit while traveling through the Swamp Biomes as the darkness makes it difficult to navigate and avoid tentacles. This means sacrificing your backpack.
- If you haven't found any of these food sources and you're getting desperate for food, you're going to have to resort to Spiders. Cooked Monster Meat can be a life saver at the expense of sanity.
- Suggested items to bring over from previous level:
- A stack of gold to facilitate making the Miner's Hats.
- A Walking Cane to kite and travel faster.
- A stack of Jerky or other long-lasting food supply that also restores health or sanity.
- Spider Silk for catching Fireflies with Bug Nets and Top Hats or a Tam o' Shanter (highly recommended) to use when standing near stationary light sources; or pre-captured stack of Fireflies for Miner Hats, or something else of your choosing.
Epilogue: Checkmate
- Appears after all the other chapters.
"Well, this is it. You found me. Now, what are you going to do?"
— Maxwell meeting the player
This is the last level and the player has reached Maxwell's Island – a small labyrinth leading to Maxwell's hall.
Epilogue is a dark and dead wasteland, with a hallway in the center leading to the Nightmare Throne. The hallway branches of into small areas containing resources. The first area contains 4 chests full with supplies, in the second area there is some grass and berry bushes (most are barren), the third area has 3 crafting stations used for prototyping, and the last area has 3 Crock Pots and some mixed food laying on the ground next to them. There is permanent night and Maxwell's Lights are showing your way. No matter what level your sanity may be, eyes can be seen in the darkness. Out in the wastelands is a fully assembled Teleportato that, when used teleports the player to the Nightmare Throne. Also, the map will always be covered by fog, even after you've explored an area, thus your map will be completely useless.
At the end of the road, players will reach Maxwell's Hall. A deformed Maxwell is sitting in a large chair with a phonograph nearby playing music (if you turn it off, Maxwell will thank you). When meeting Maxwell, he will start talking, telling the player that when he got here there was nothing but dust, and "them" and that he doesn't know what they want, that they are just watching. If the player attacks Maxwell, then the throne protects him (a lightning will strike you and no matter what weapon you are holding, it will vanish), and Maxwell tells the player that the throne will not allow it. He also tells you that he has been around here for a long time, and that the player can stay around and keep him company, or to put the key in the box.
Next to the throne is the Nightmare Lock where the Divining Rod can be placed. If the Divining Rod is put in the lock, the game will ask you if you want to take pity on Maxwell but also that his captors would not be happy about it. When Maxwell is freed from the throne, he gets up and instantly dies, then turns to dust and fades away. Your character is grabbed by Shadow Hands and is placed on the throne, effectively taking Maxwell's place and becoming the new pawn (and turning the phonograph on again, if the player had turned it off before). After that you will get the final speech from Klei, and then be brought back to your sandbox game...as Maxwell! Congratulations! You have beaten Adventure Mode!
Note: If you beat Adventure World as Maxwell, the person you completed the game with last will be sitting in the chair, still doing the terrified animation. Unlocking the lock will kill them, and put Maxwell back in the chair. You will wake up in your world as that person.
Note: There will still be periodic Hound Attacks in this level.
Easter egg: Far behind (in the left side) the Nightmare throne is a graveyard, with an Eyebone and a Miner Hat next to a skeleton. On the graves are the names of the developers of the game, one example being Kevin Forbes. Caution is advised if the graves are dug up, as ghosts have a 100% chance to spawn from them.
Easter egg: Randomly placed somewhere on the map, there is an island made of 2-3 tiles, on which there is a Teleportato as well as the 4 pieces. This island cannot be reached or "mapped" without the use of cheats, and when this Teleportato is used, it teleports you back to the nightmare throne and a second deformed Maxwell will spawn (not on the throne) and say "Don't you think I've tried that?" then disappear.
Easter egg: If you use the console to reveal the minimap fog, an island will be visible that is completely barren save for the underlaying grass turf. This island may be a sandbox, allowing the player to use the console to spawn or build anything they like without any of the normal world distractions like the day/night cycle, weather, mobs, etc.
 Bugs
Bugs

- Chapters can be skipped by rapidly clicking the "Lets go" button. (1:45)

- In Chapter 5, "Darkness," at full moon if the game is saved and reloaded the full moon will be permanent.
- If the player beats Adventure Mode as Woodie and takes pity on Maxwell, the Nightmare Throne (and by extension, Woodie) will be facing away from the screen.
- Sometimes, in the "The Game is Afoot" or "Archipelago" level, there is no Metal Potato Thing.